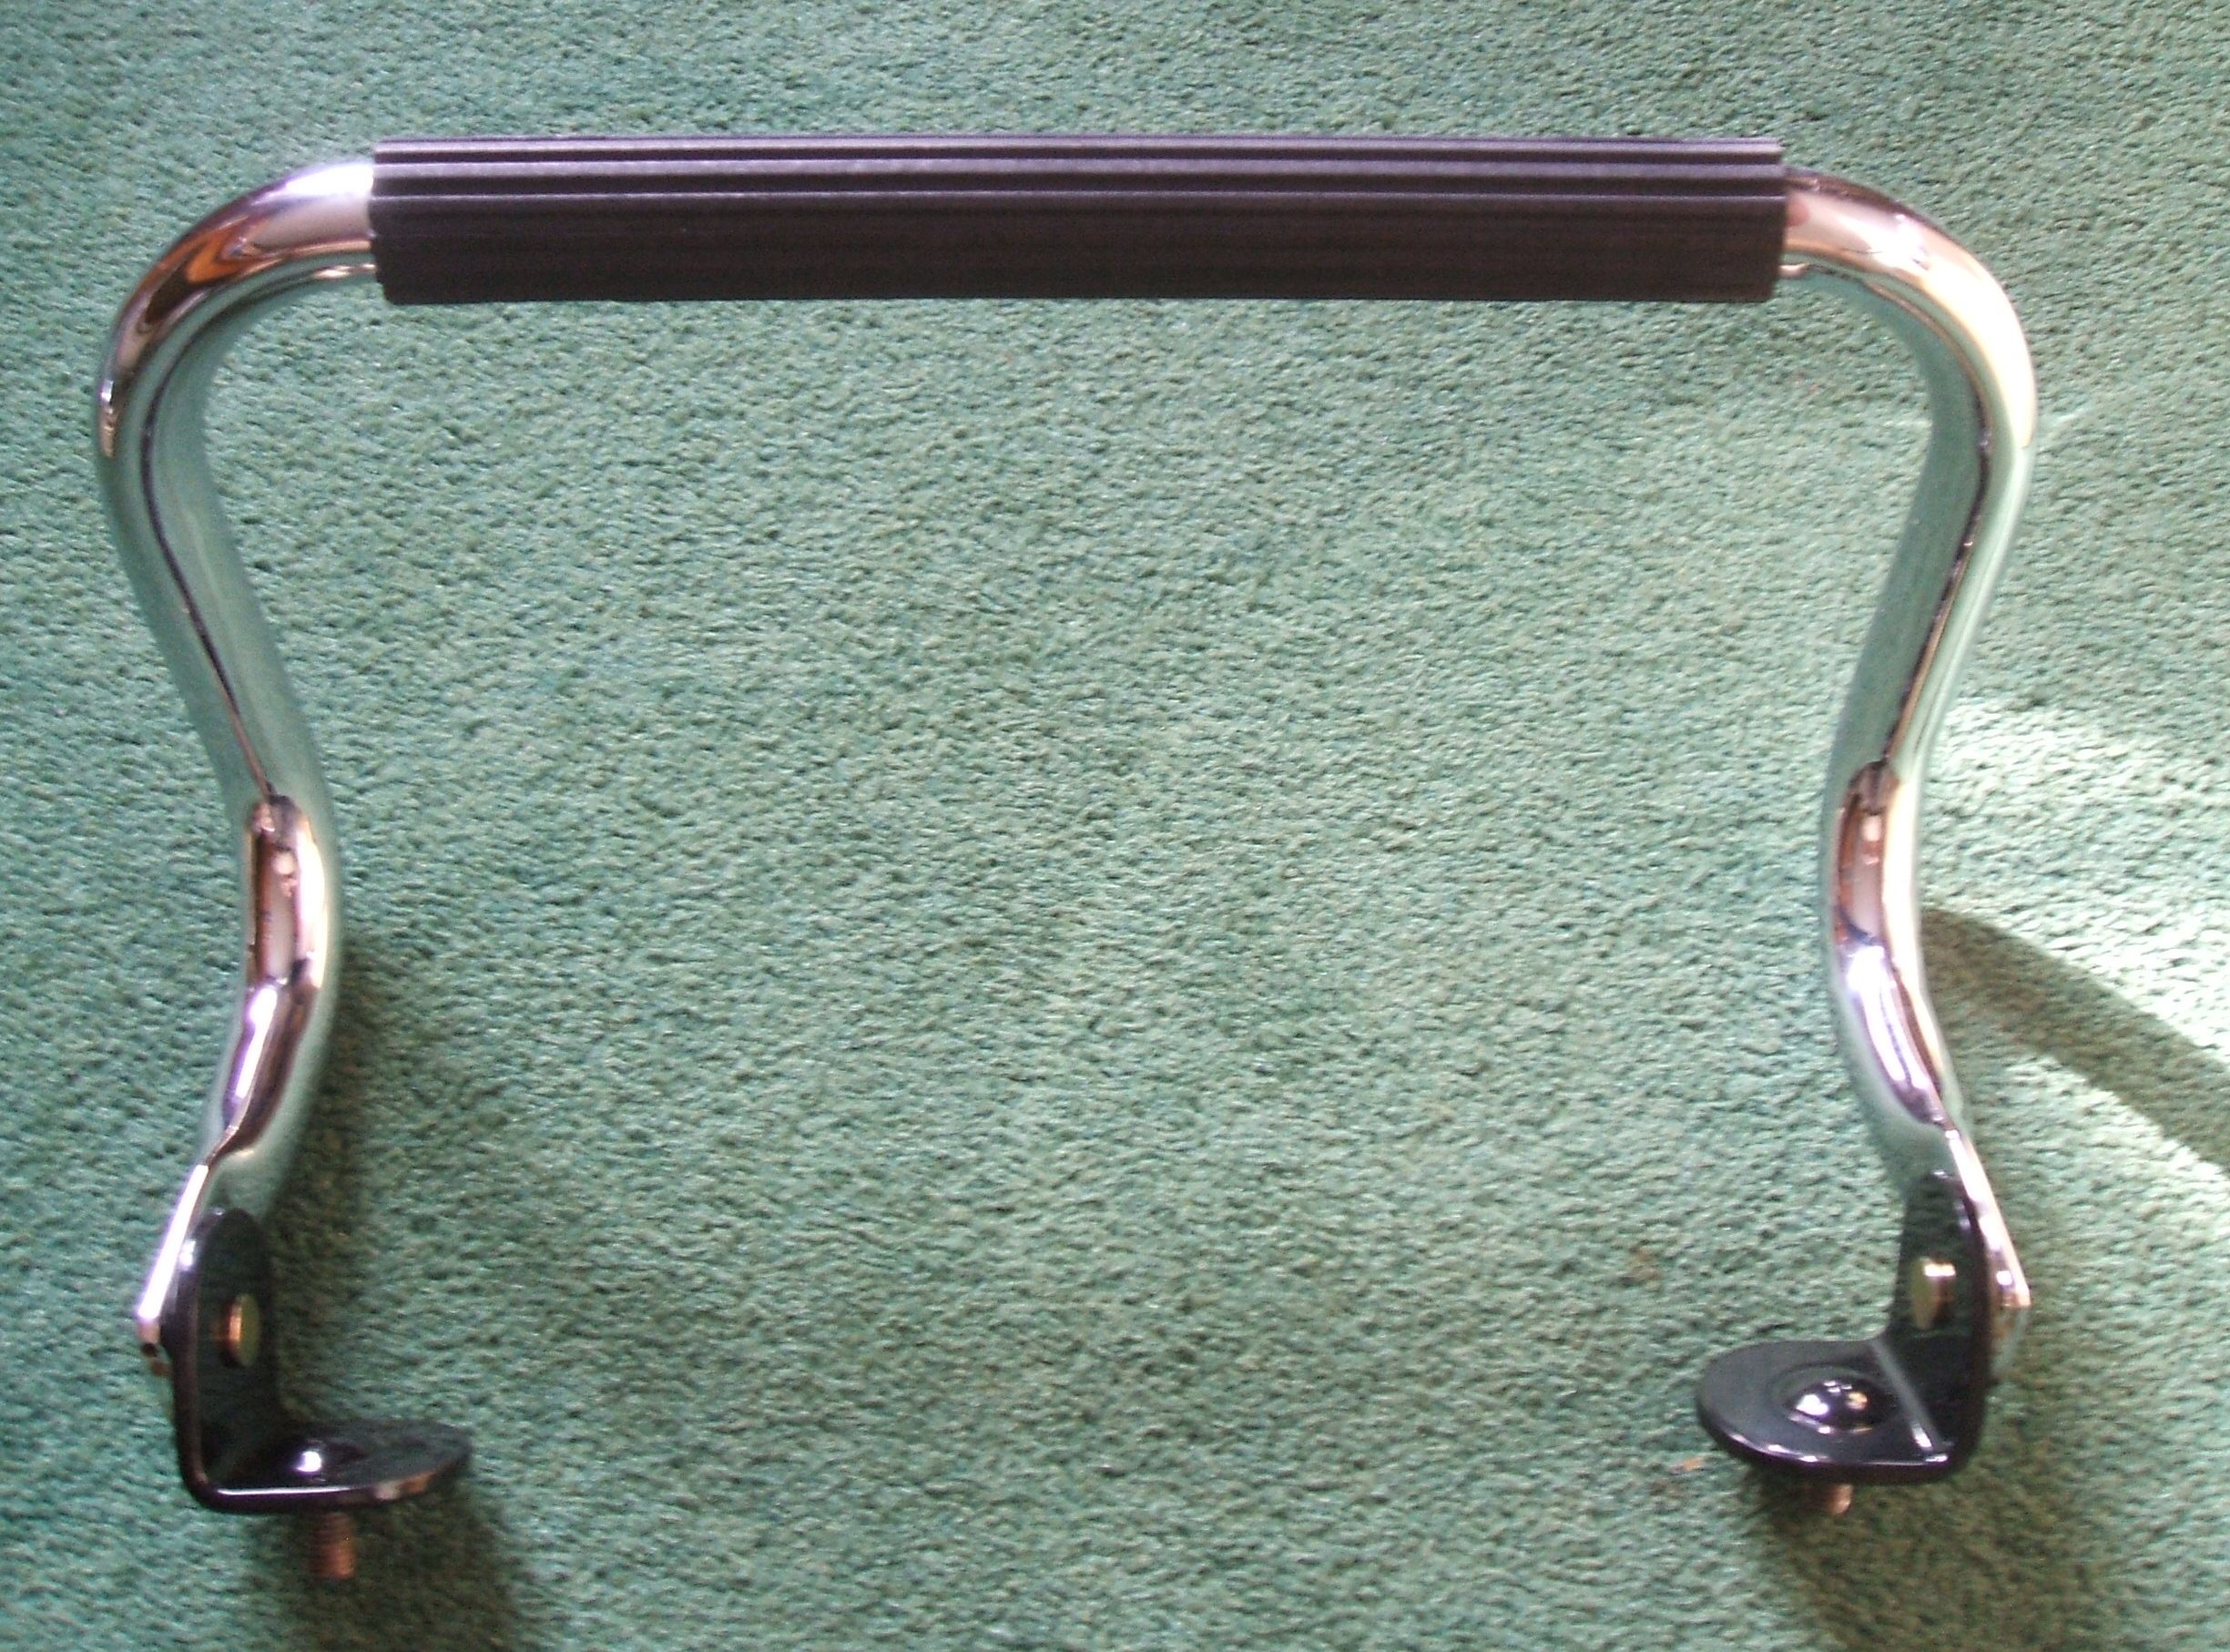
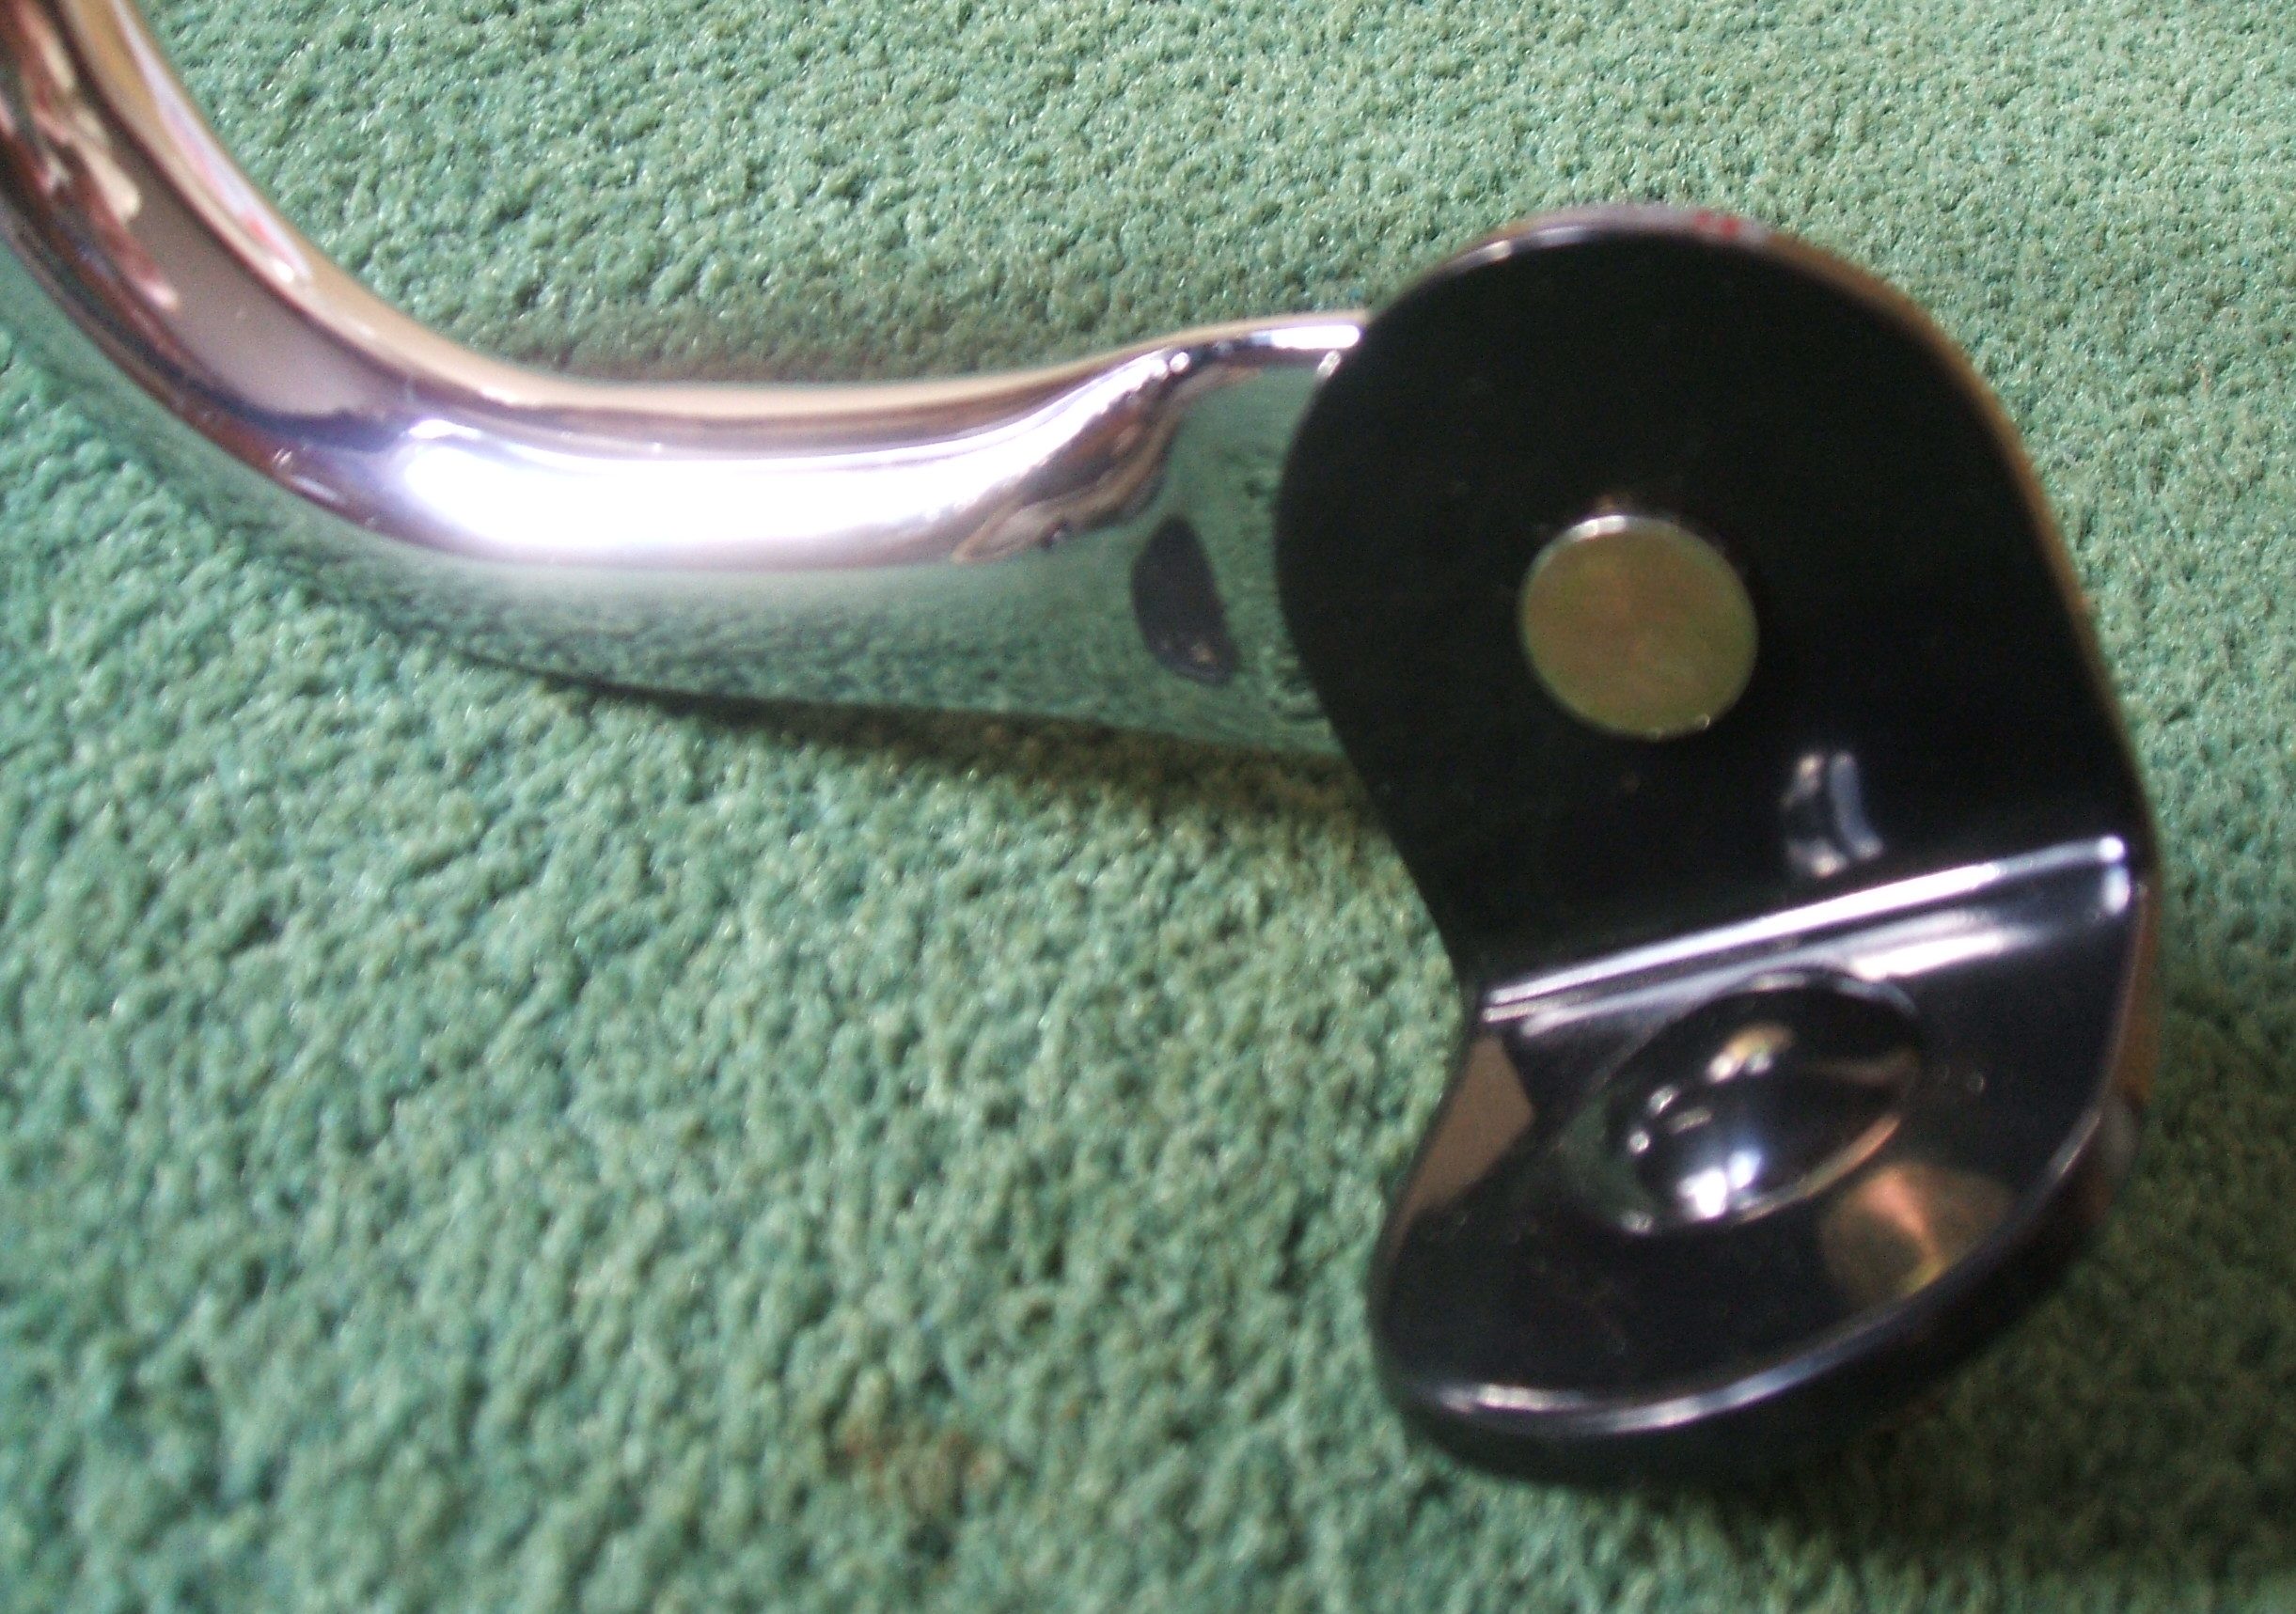
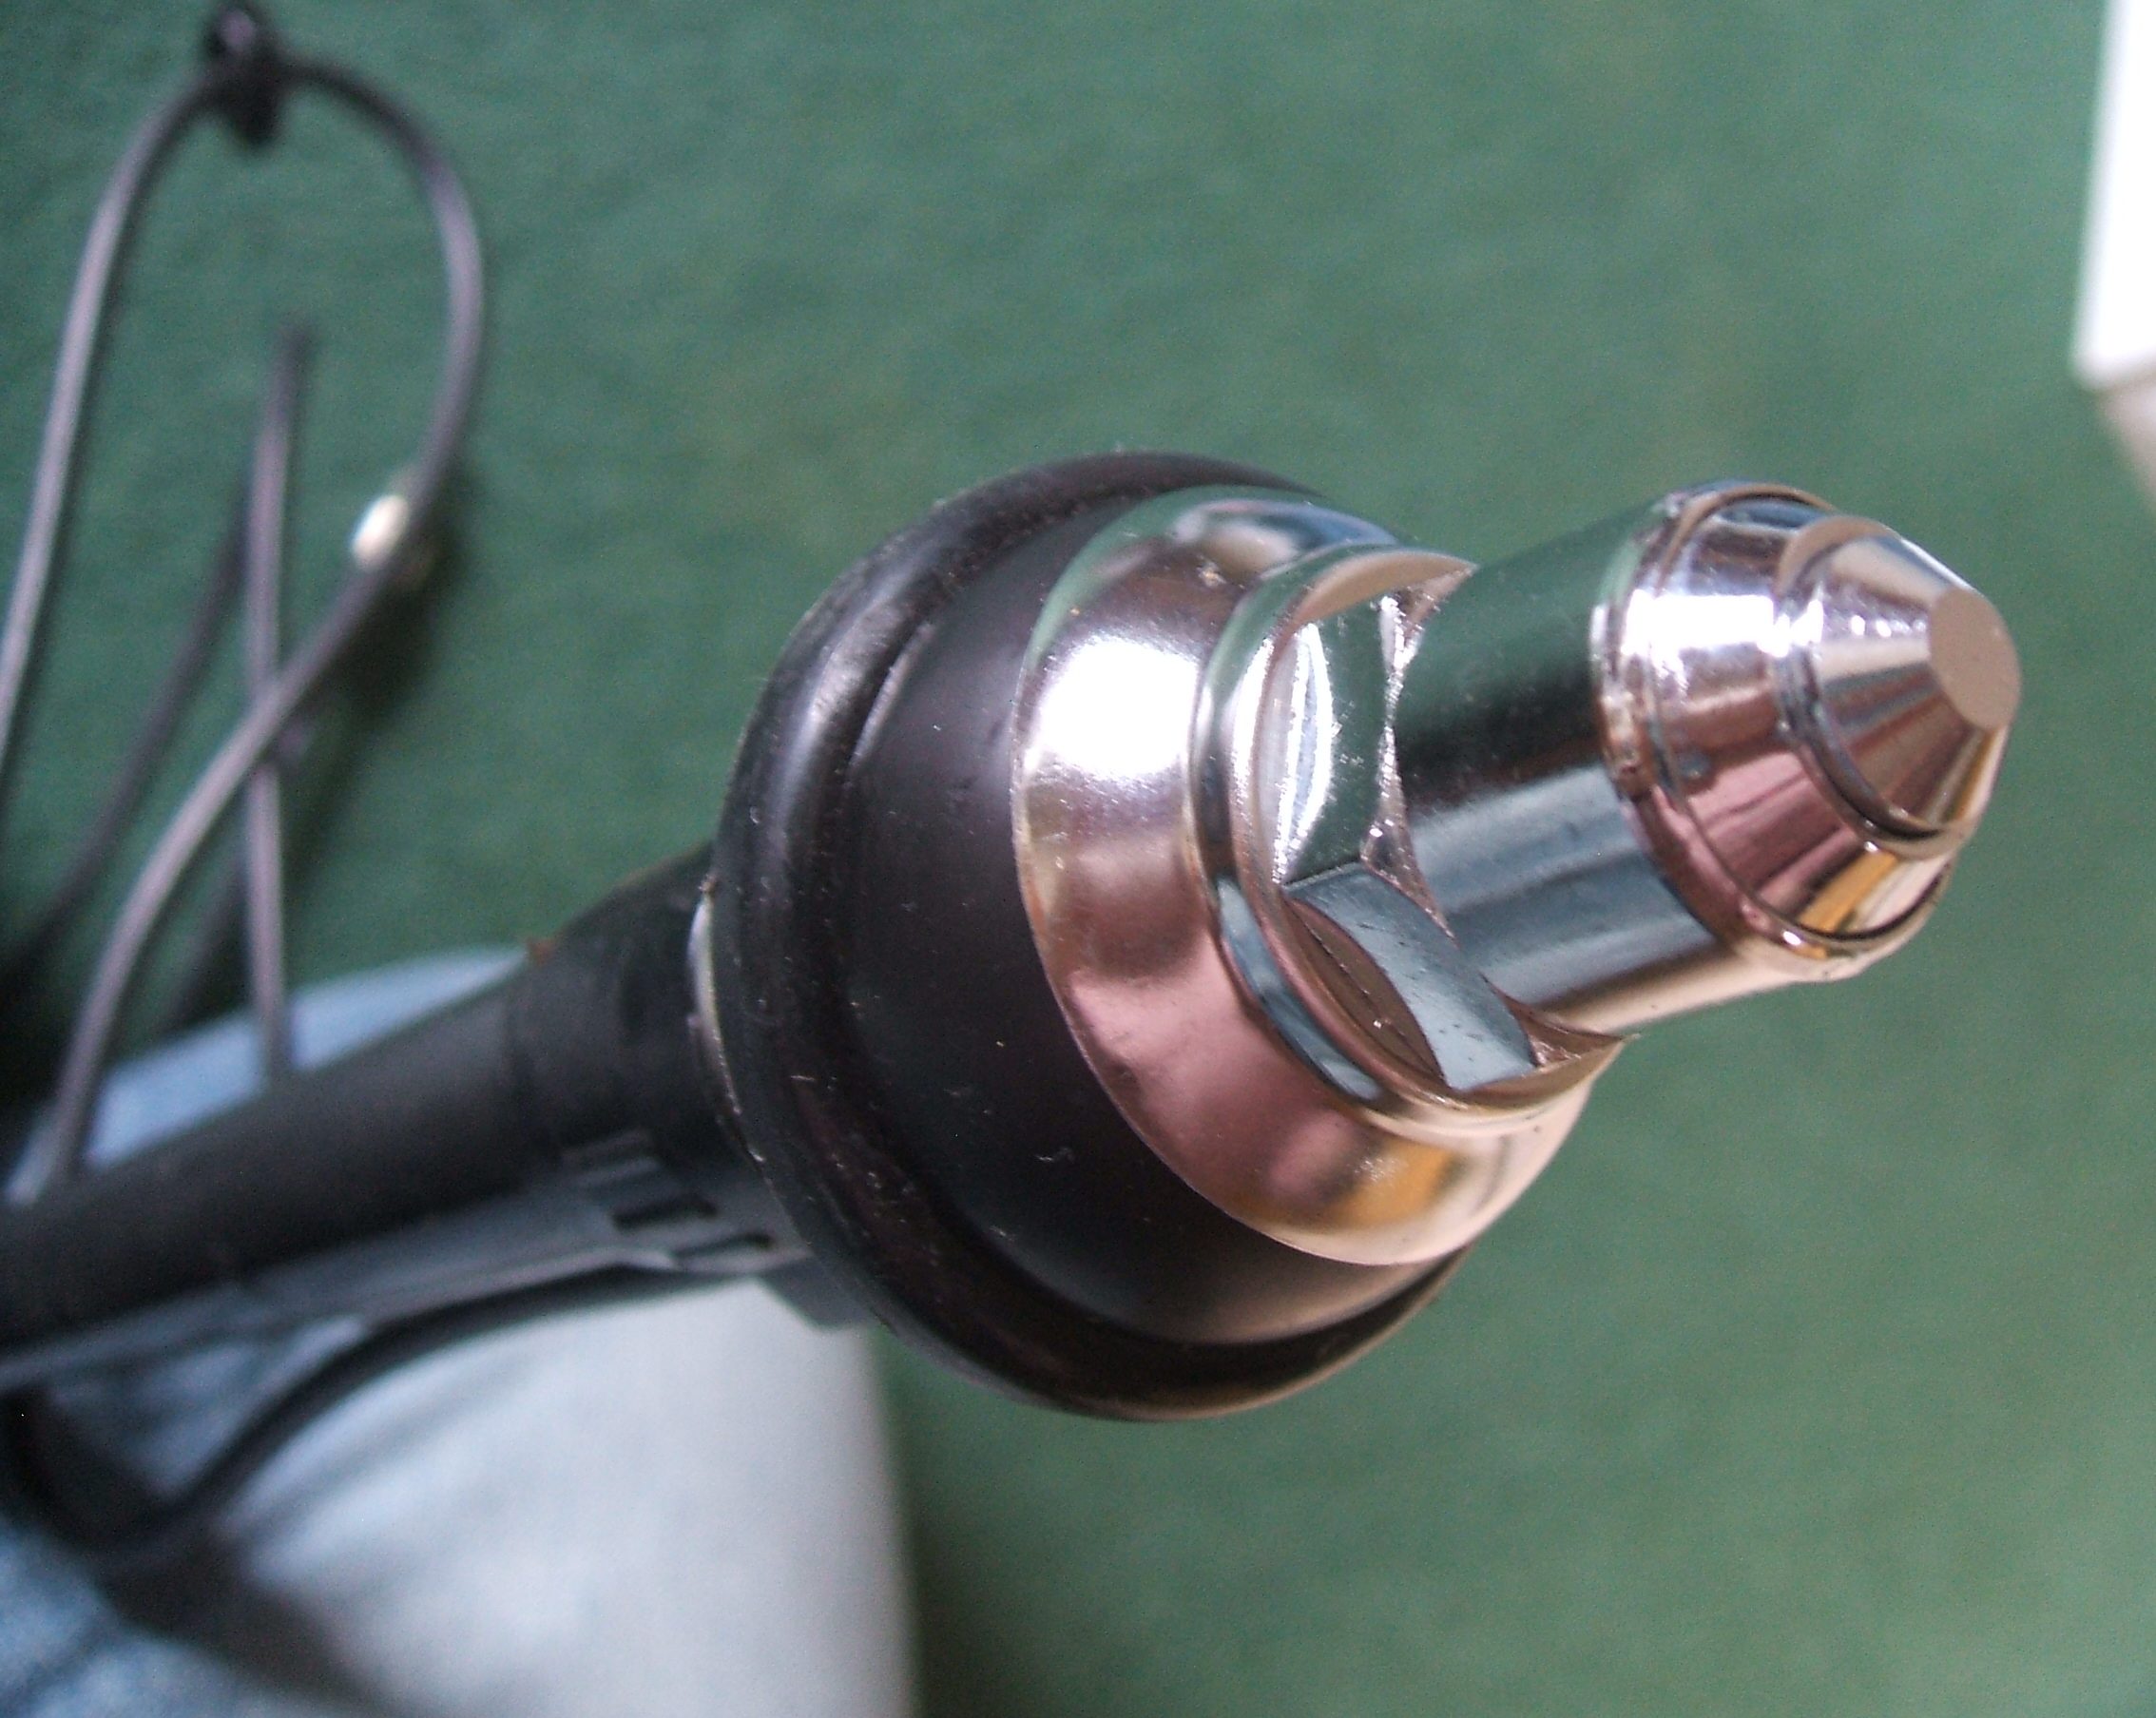
Also since the plating came back, other parts could be assembled. Like the grab handles. The clip at the end was plated. Small and it will not be seen, but I know it is done to a high standard.
また、メッキが戻ってきたので、他の部品を組み立てることができました。グラブハンドルのように。 最後のクリップはメッキされていました。 小さくて見られませんが、高水準で行われていることは承知しています。

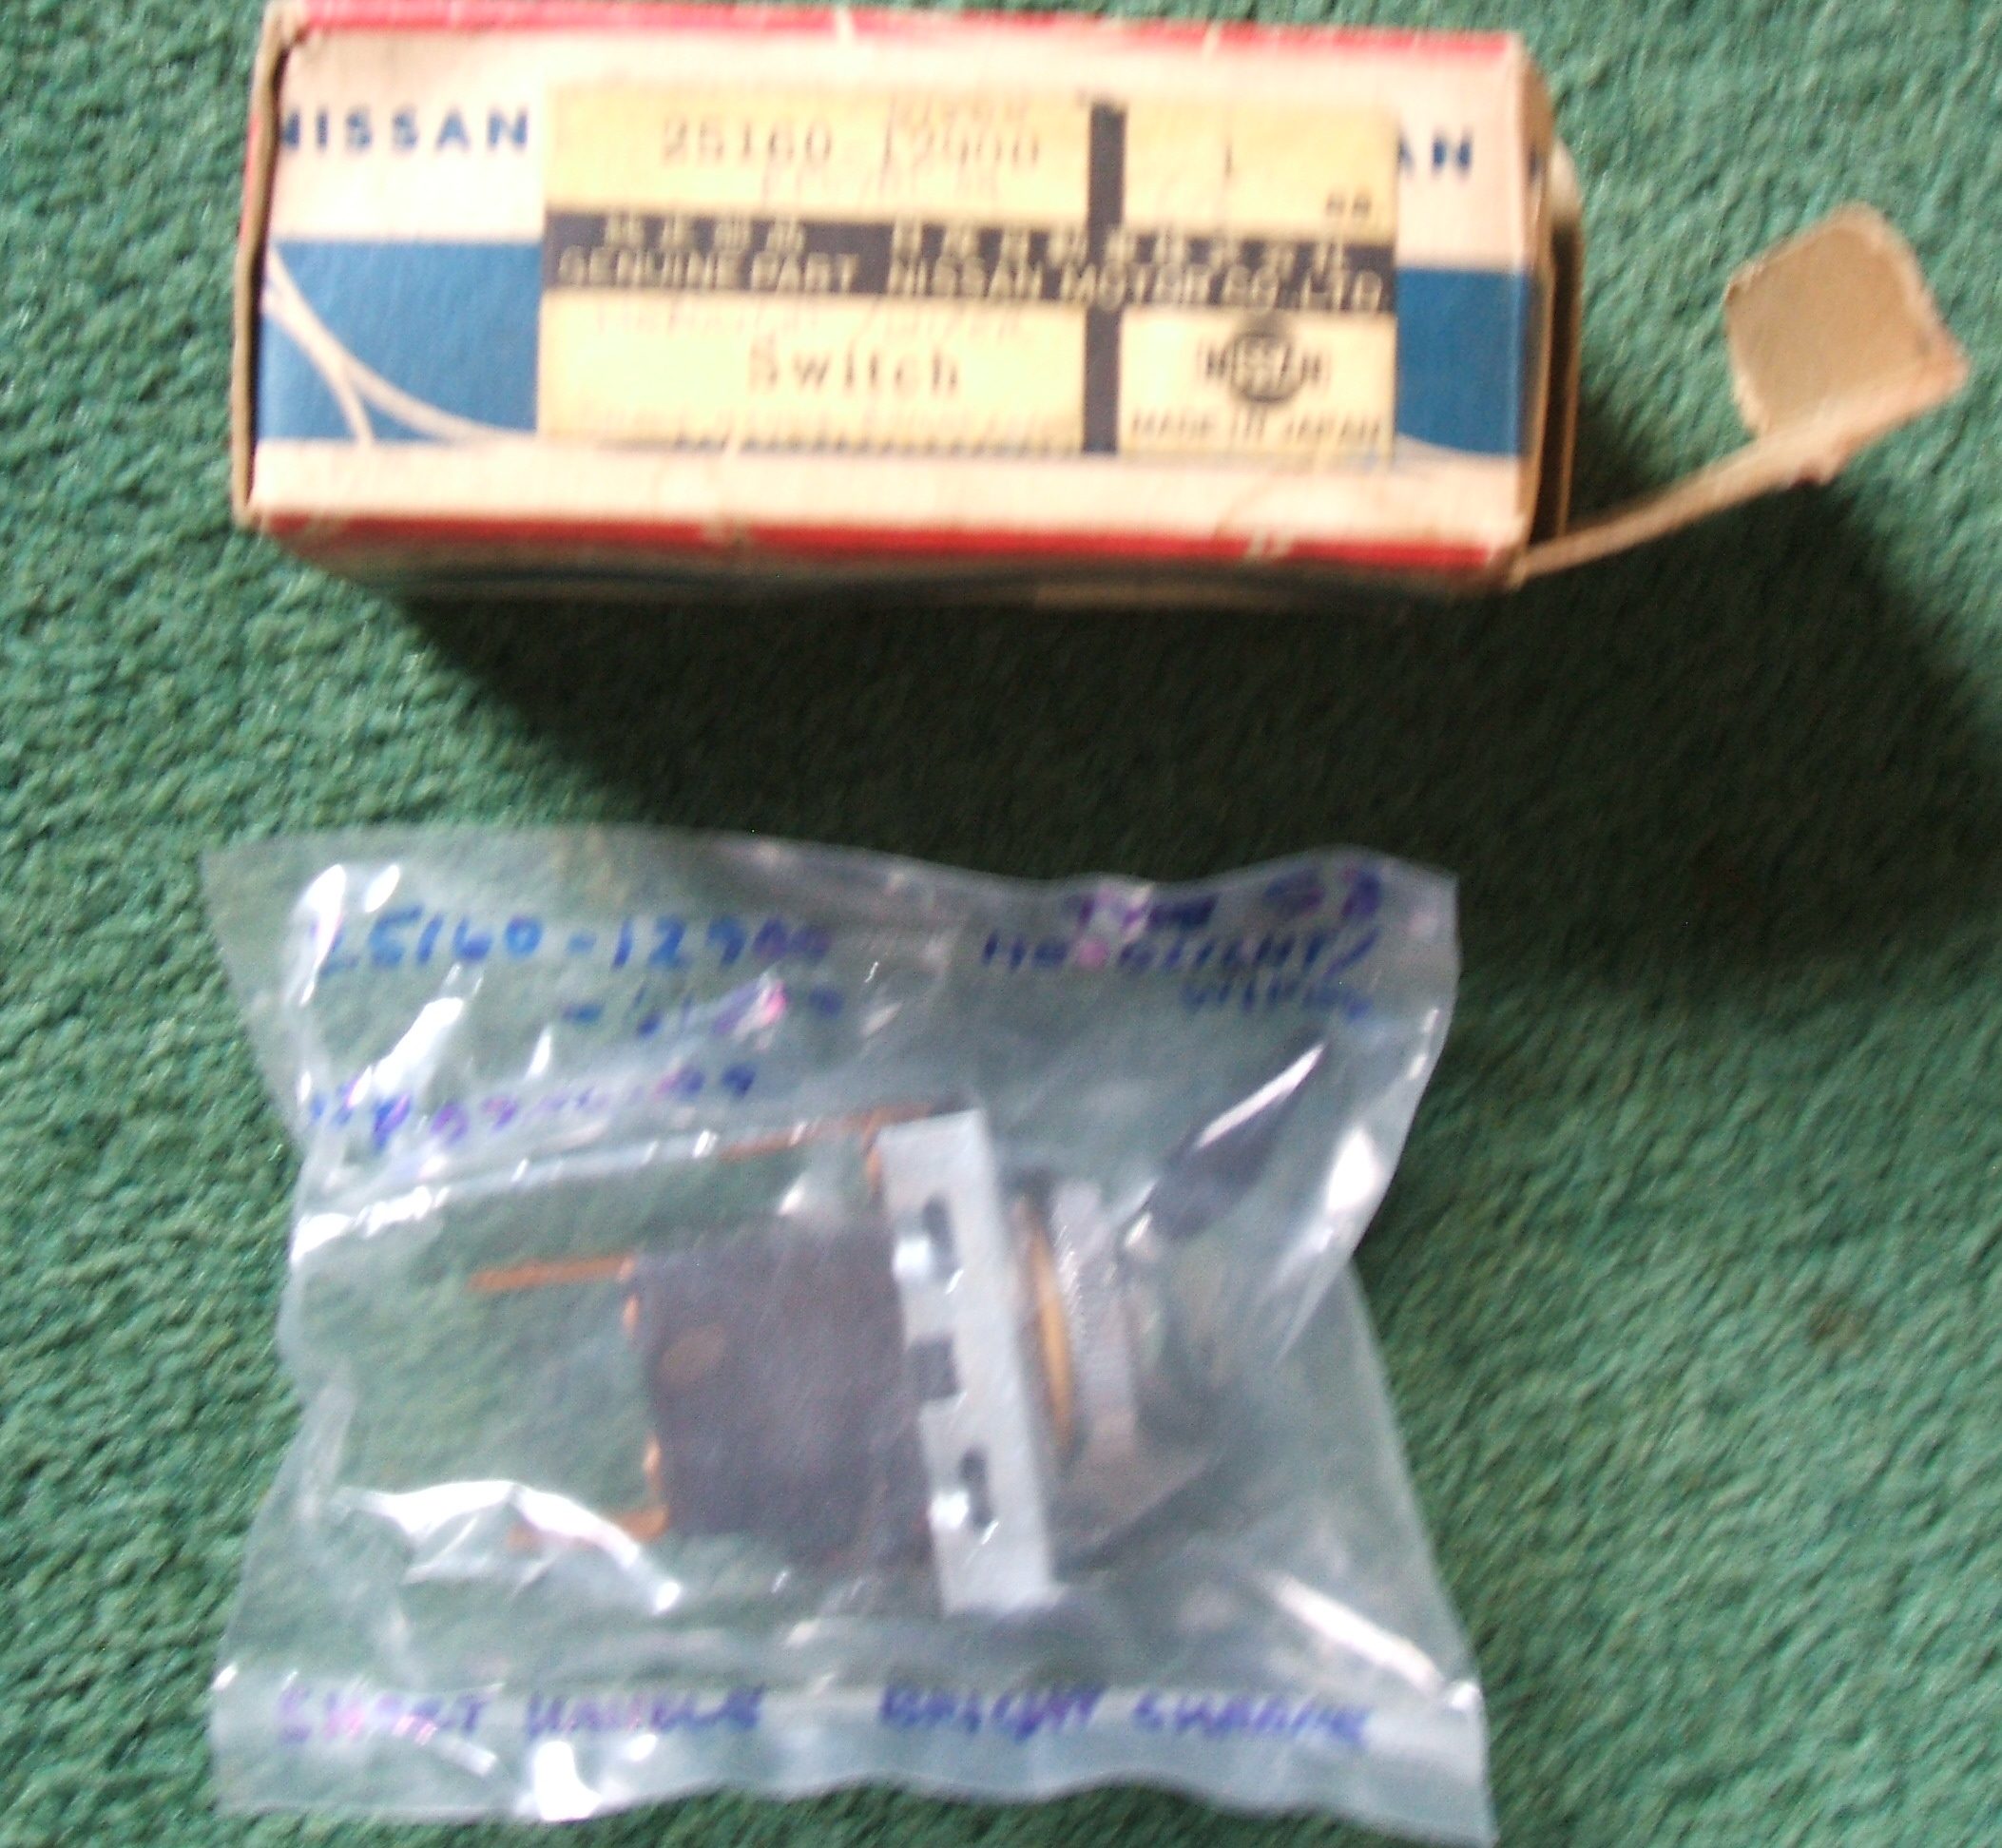
I brought a NOS resistor in its original Nissan box. As you can see, it is not looking very new.
オリジナルの日産ボックスを備えたニューオールドストック抵抗器を持ってきました。 ご覧のとおり、それほど新しくはありません。

And after some work. そして、いくつかの作業の後。

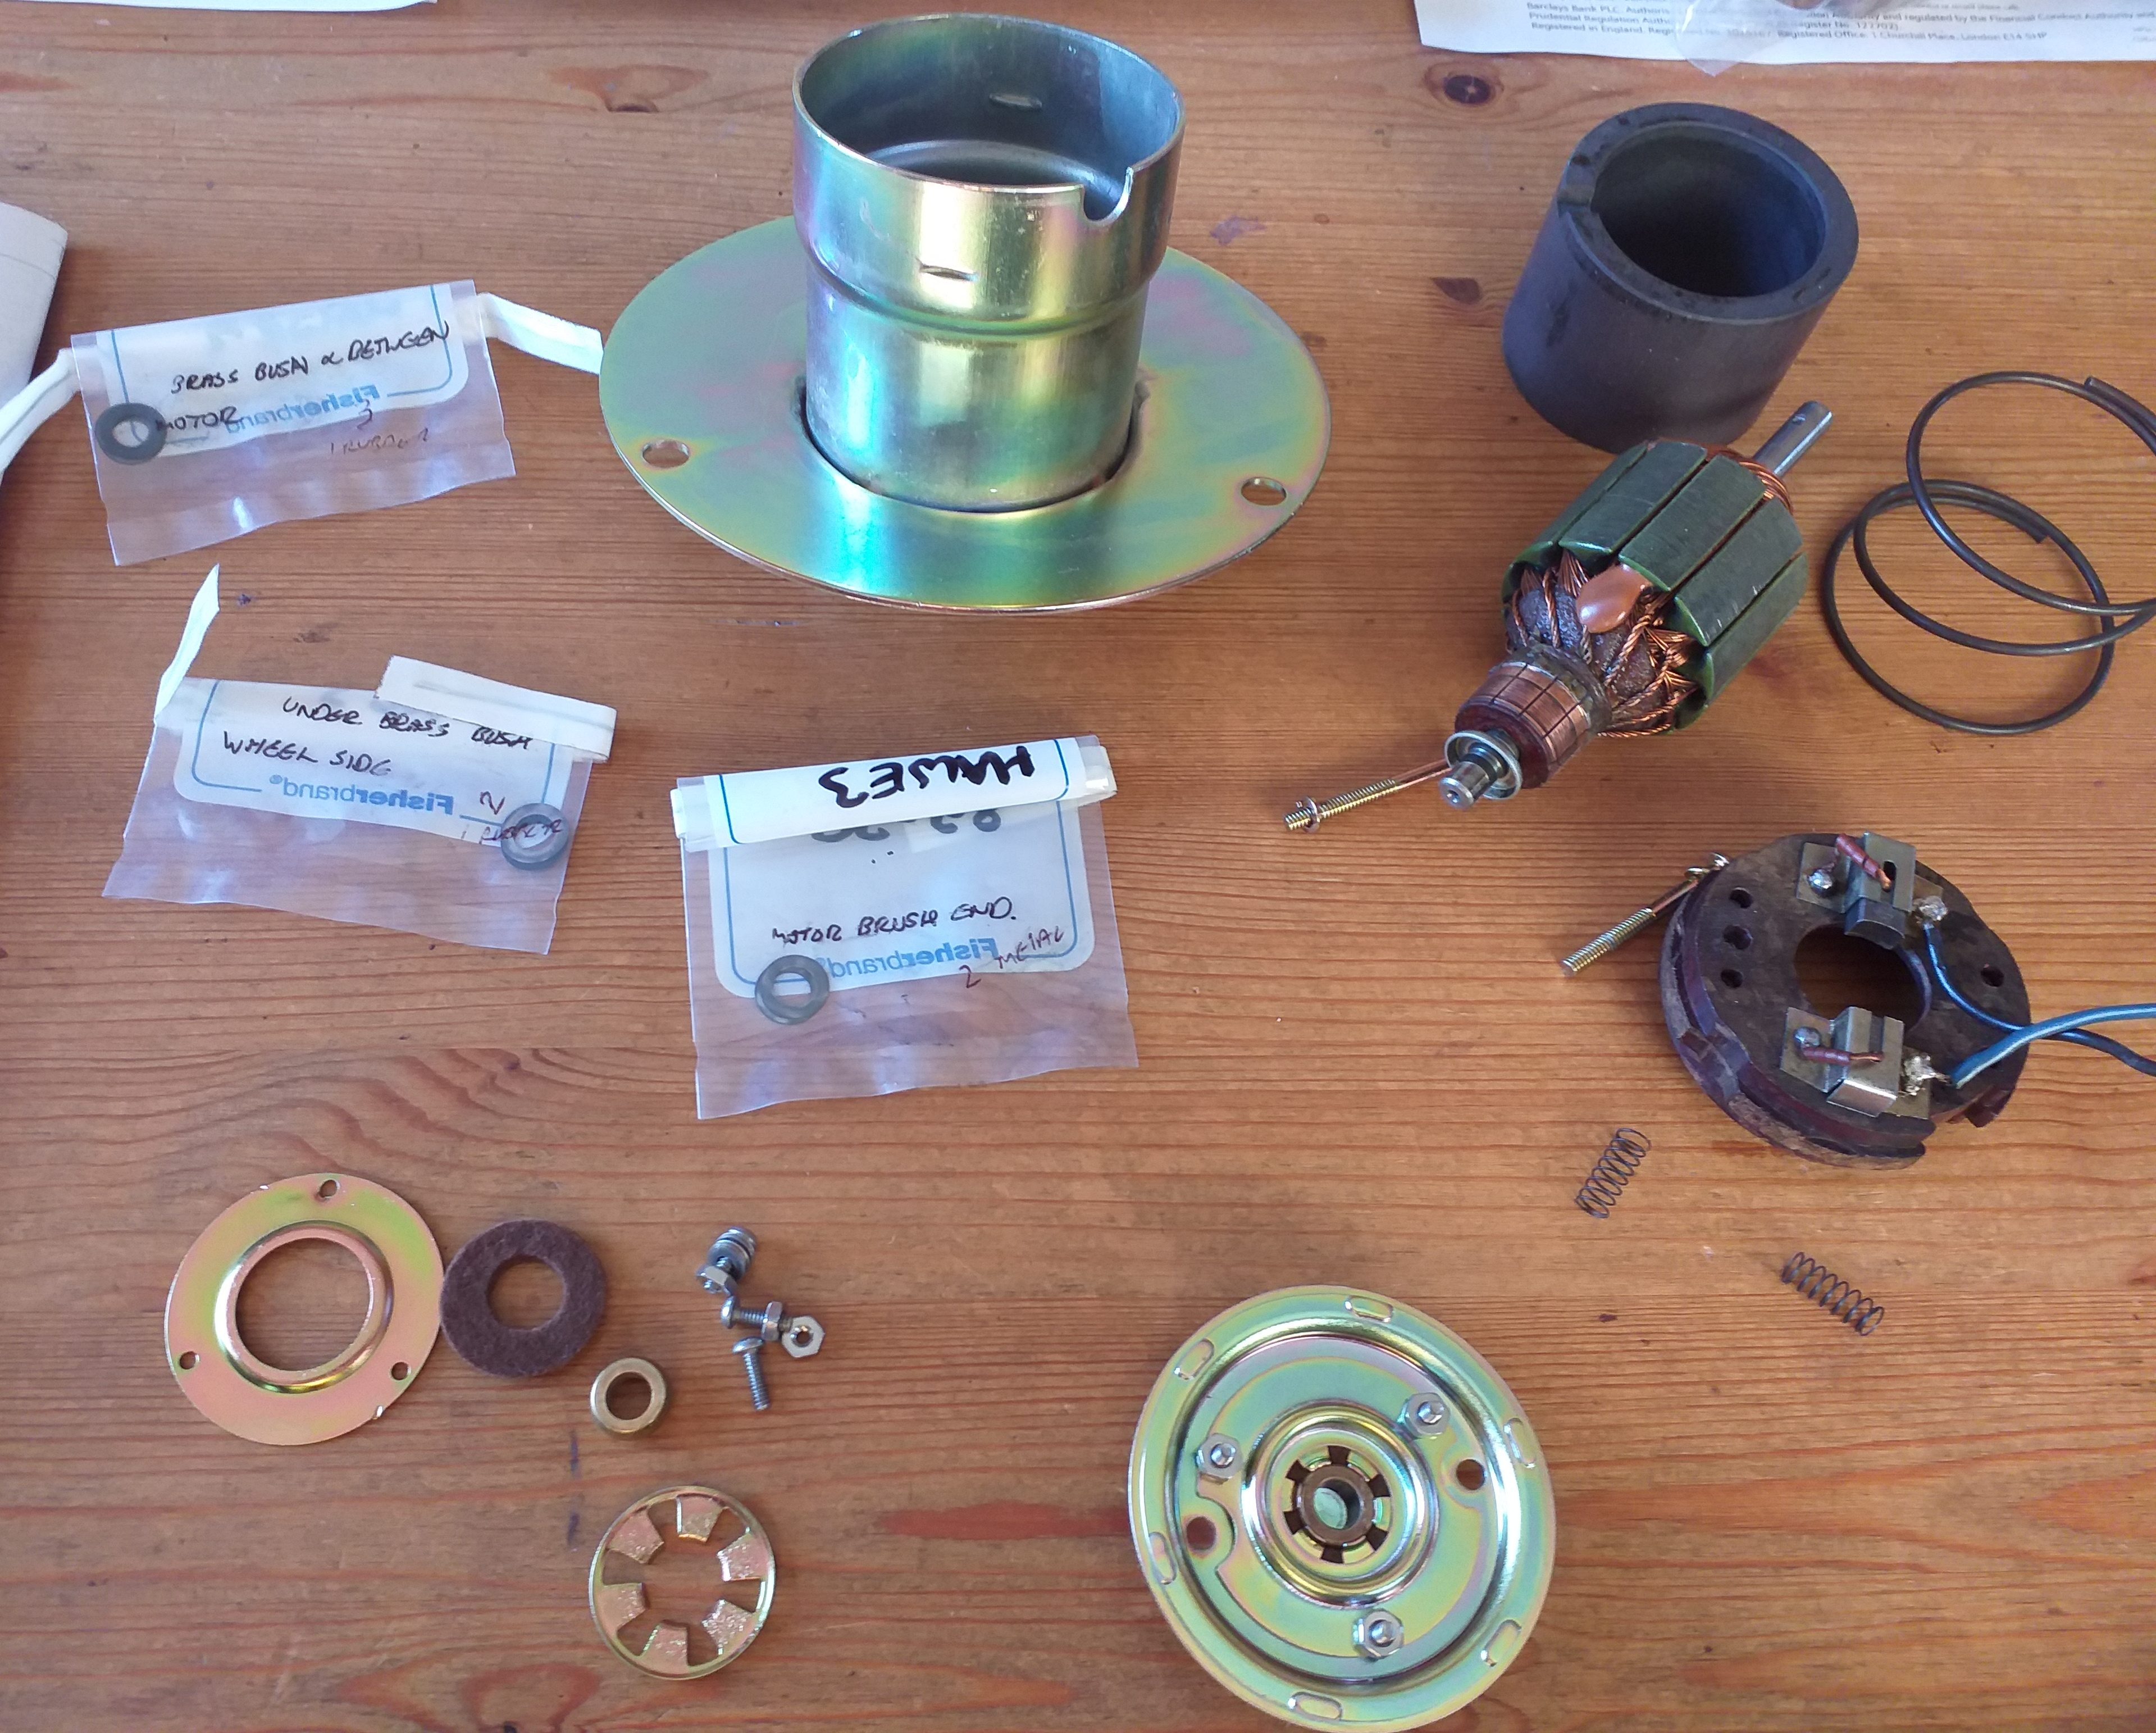
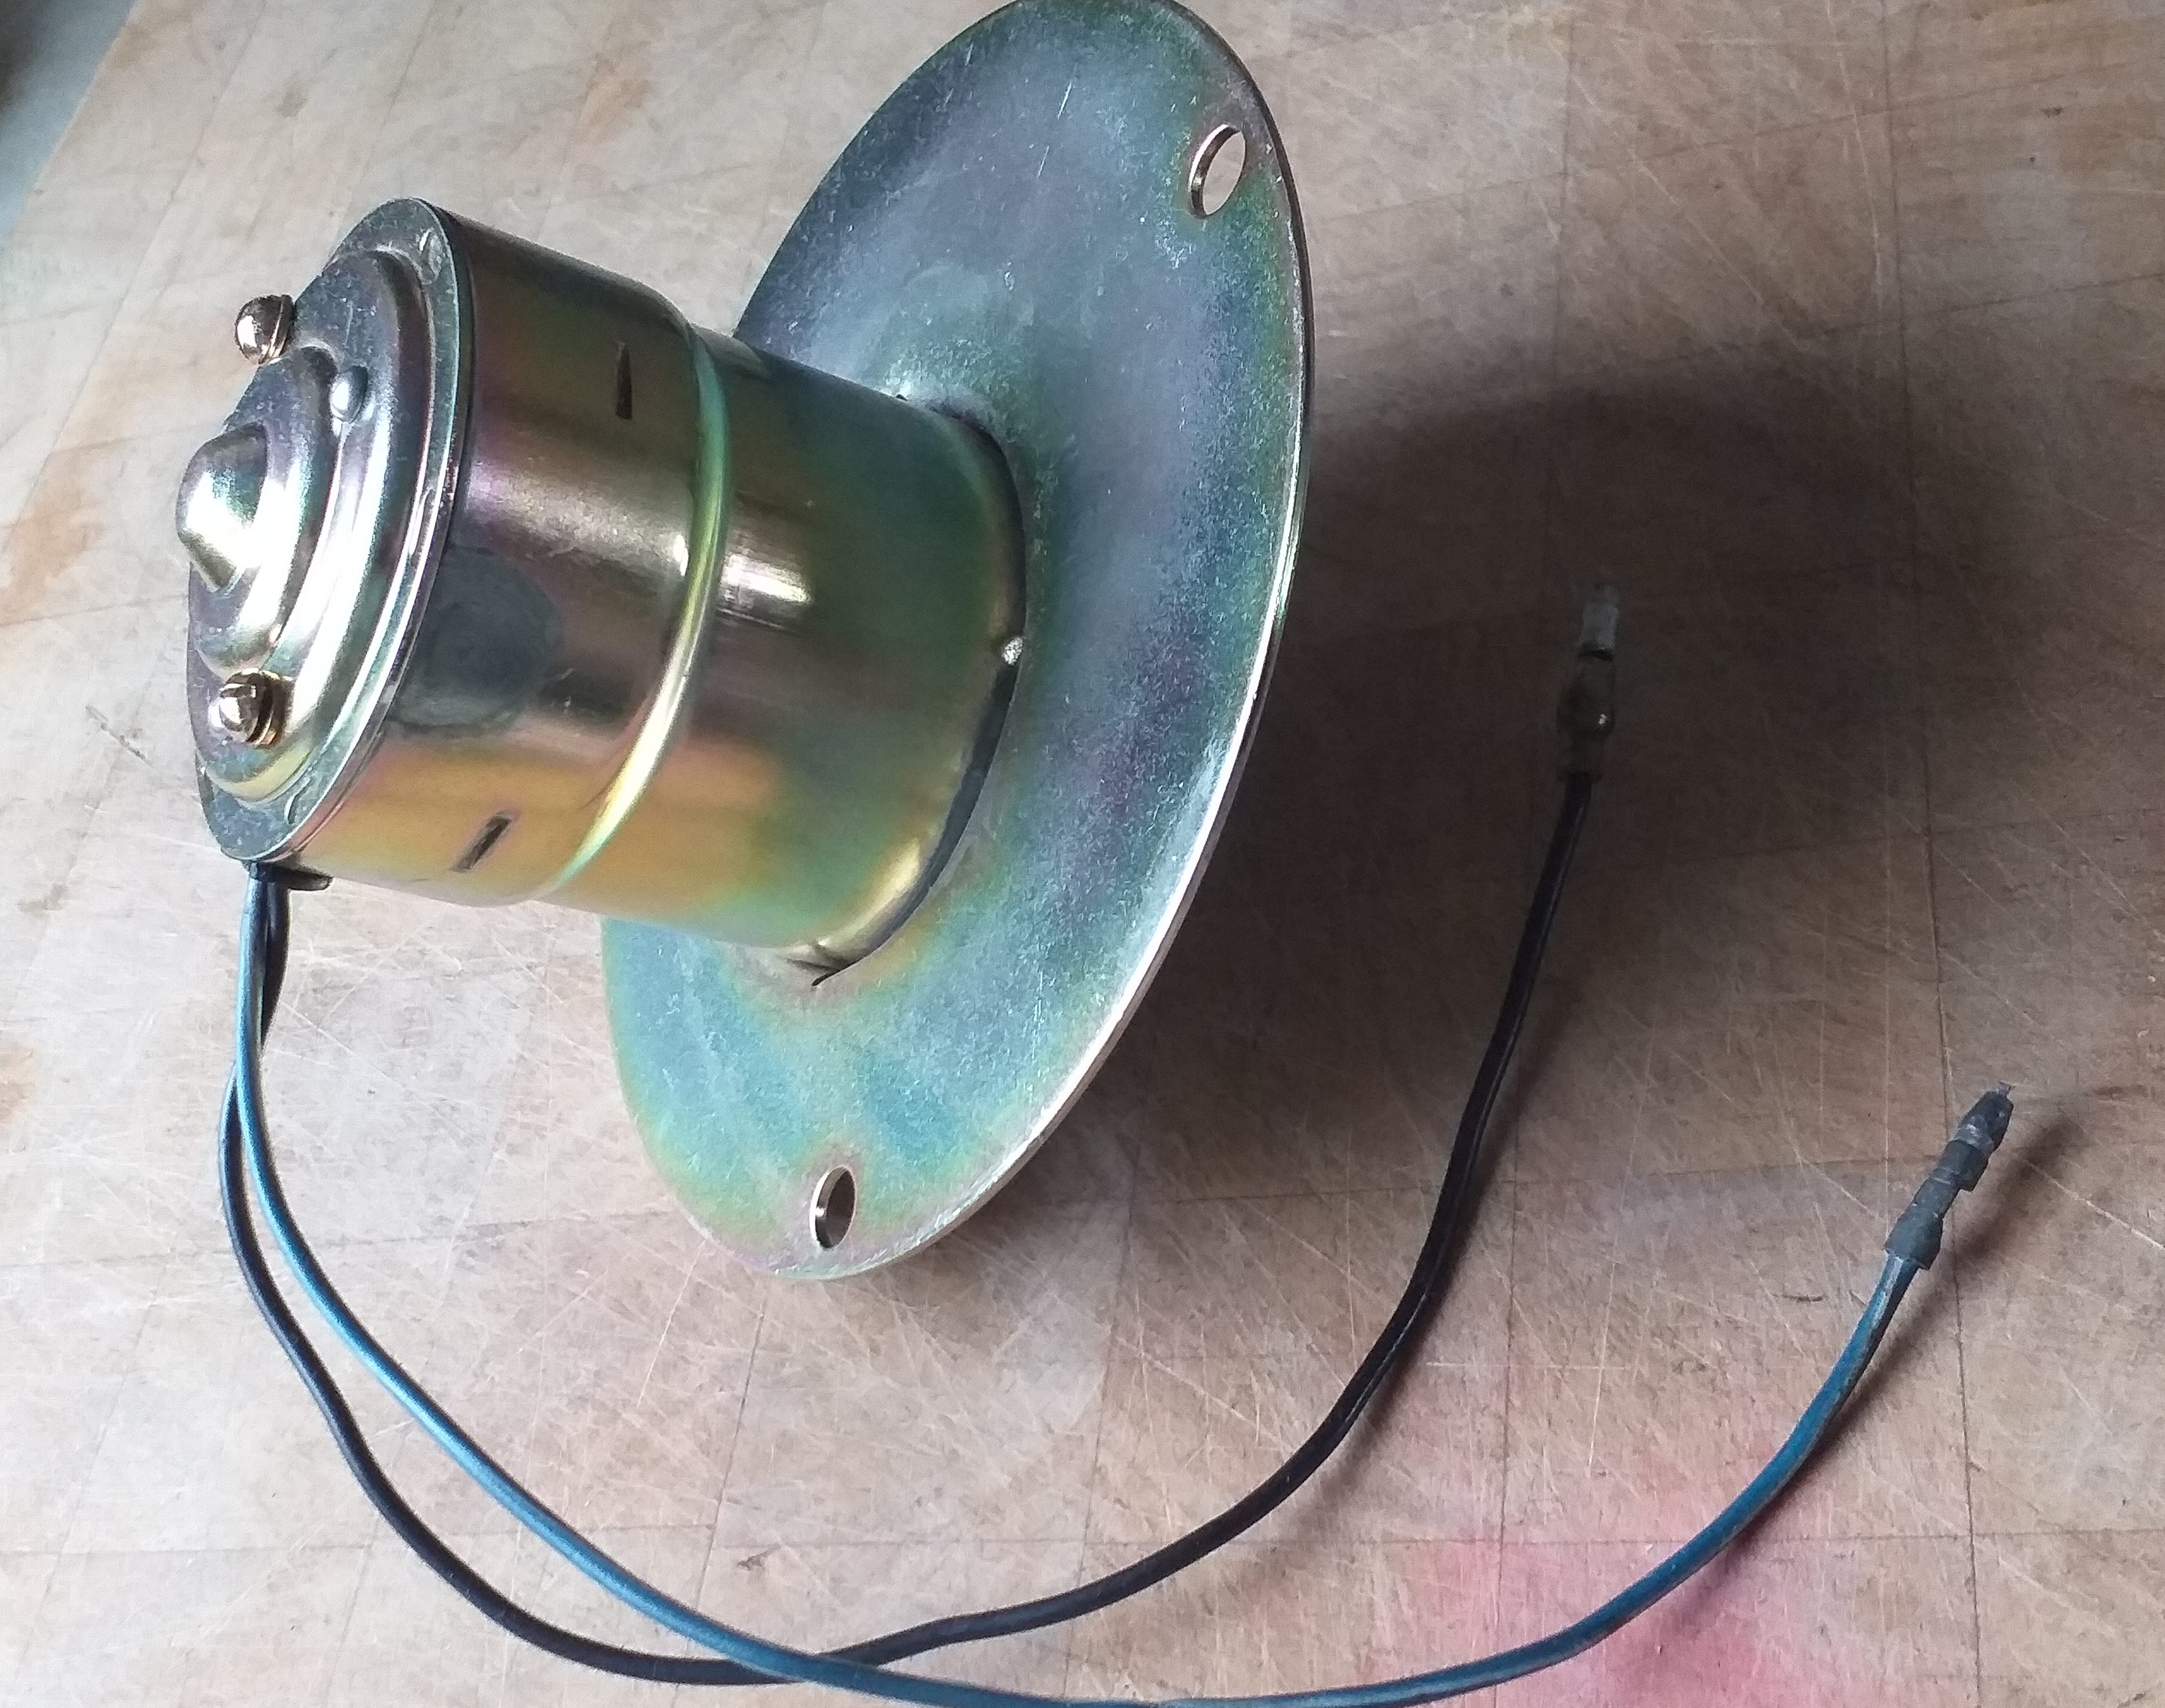
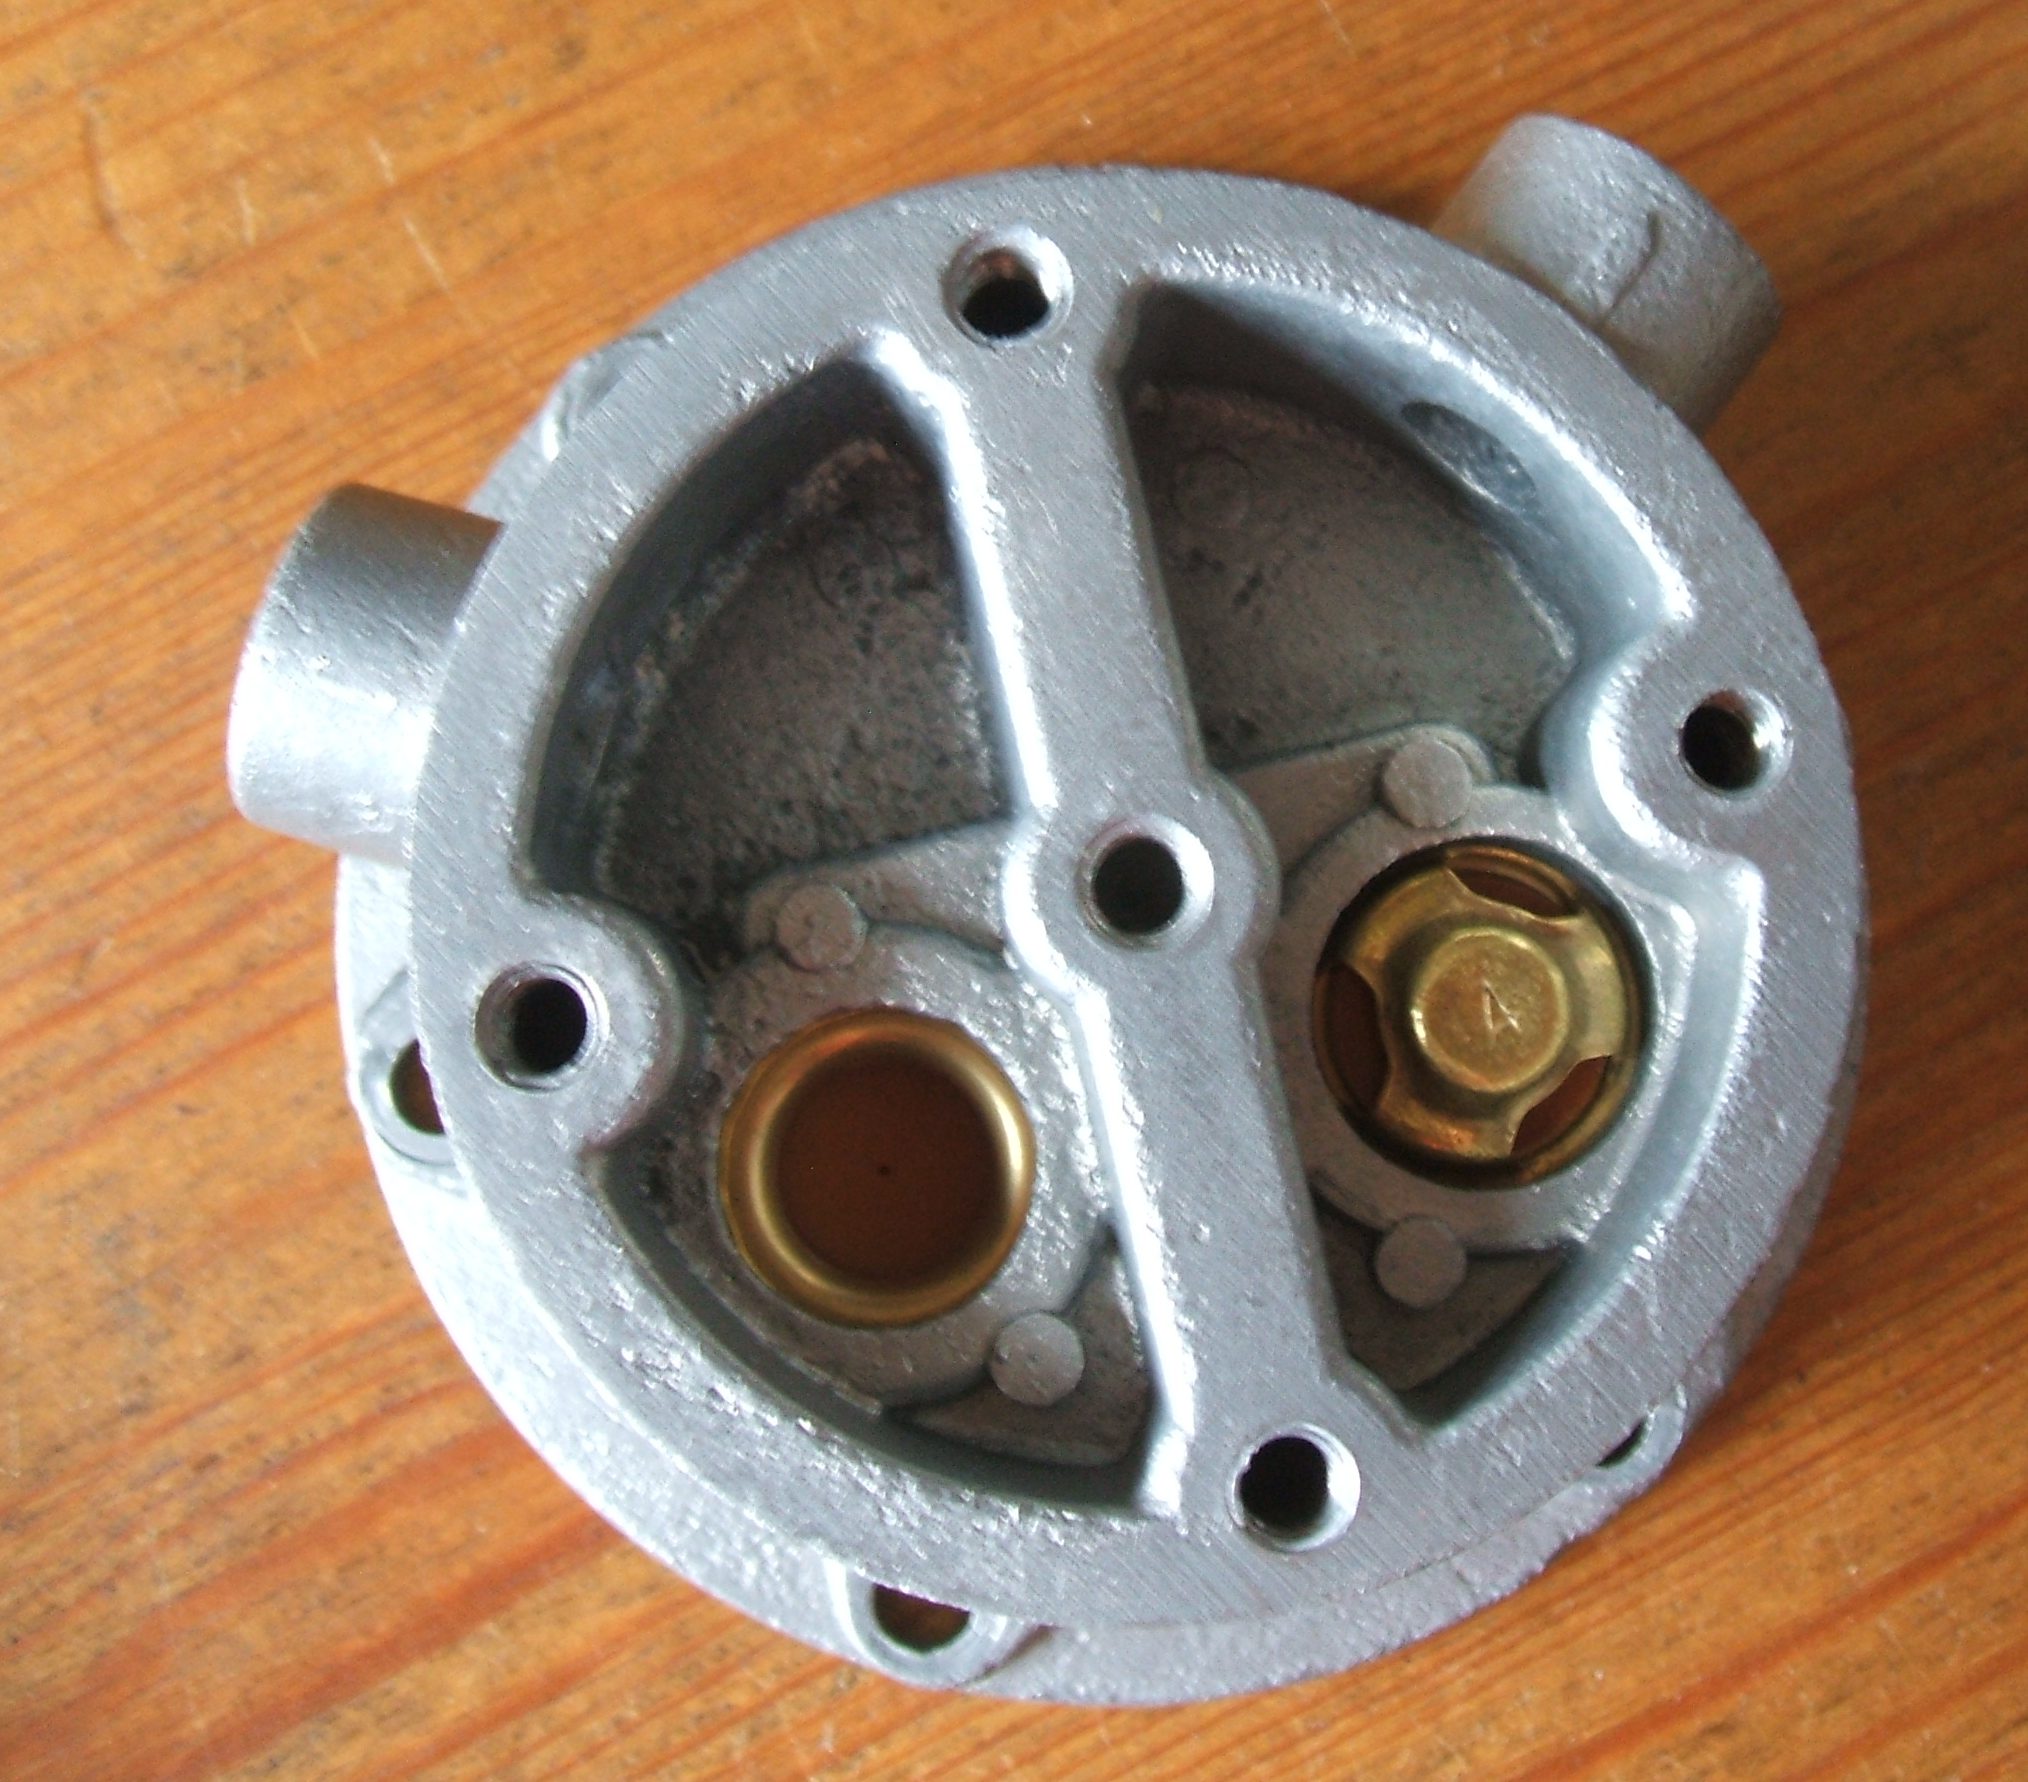
The heater motor has taken far too long to restore. Mainly because parts were lost at the plating business. I had to buy another secondhand motor to help complete the assembly. I made new brass bearings and felt washers. Here are some photos of the parts inside the motor and assembly.
ヒーターモーターの復元に時間がかかりすぎました。 主な理由は、めっき事業で部品が紛失したためです。 組み立てを完了するために、別の中古モーターを購入する必要がありました。 新しい真ちゅう製のベアリングとフェルトワッシャーを作りました。モーターとアセンブリの内部の部品の写真をいくつか示します。


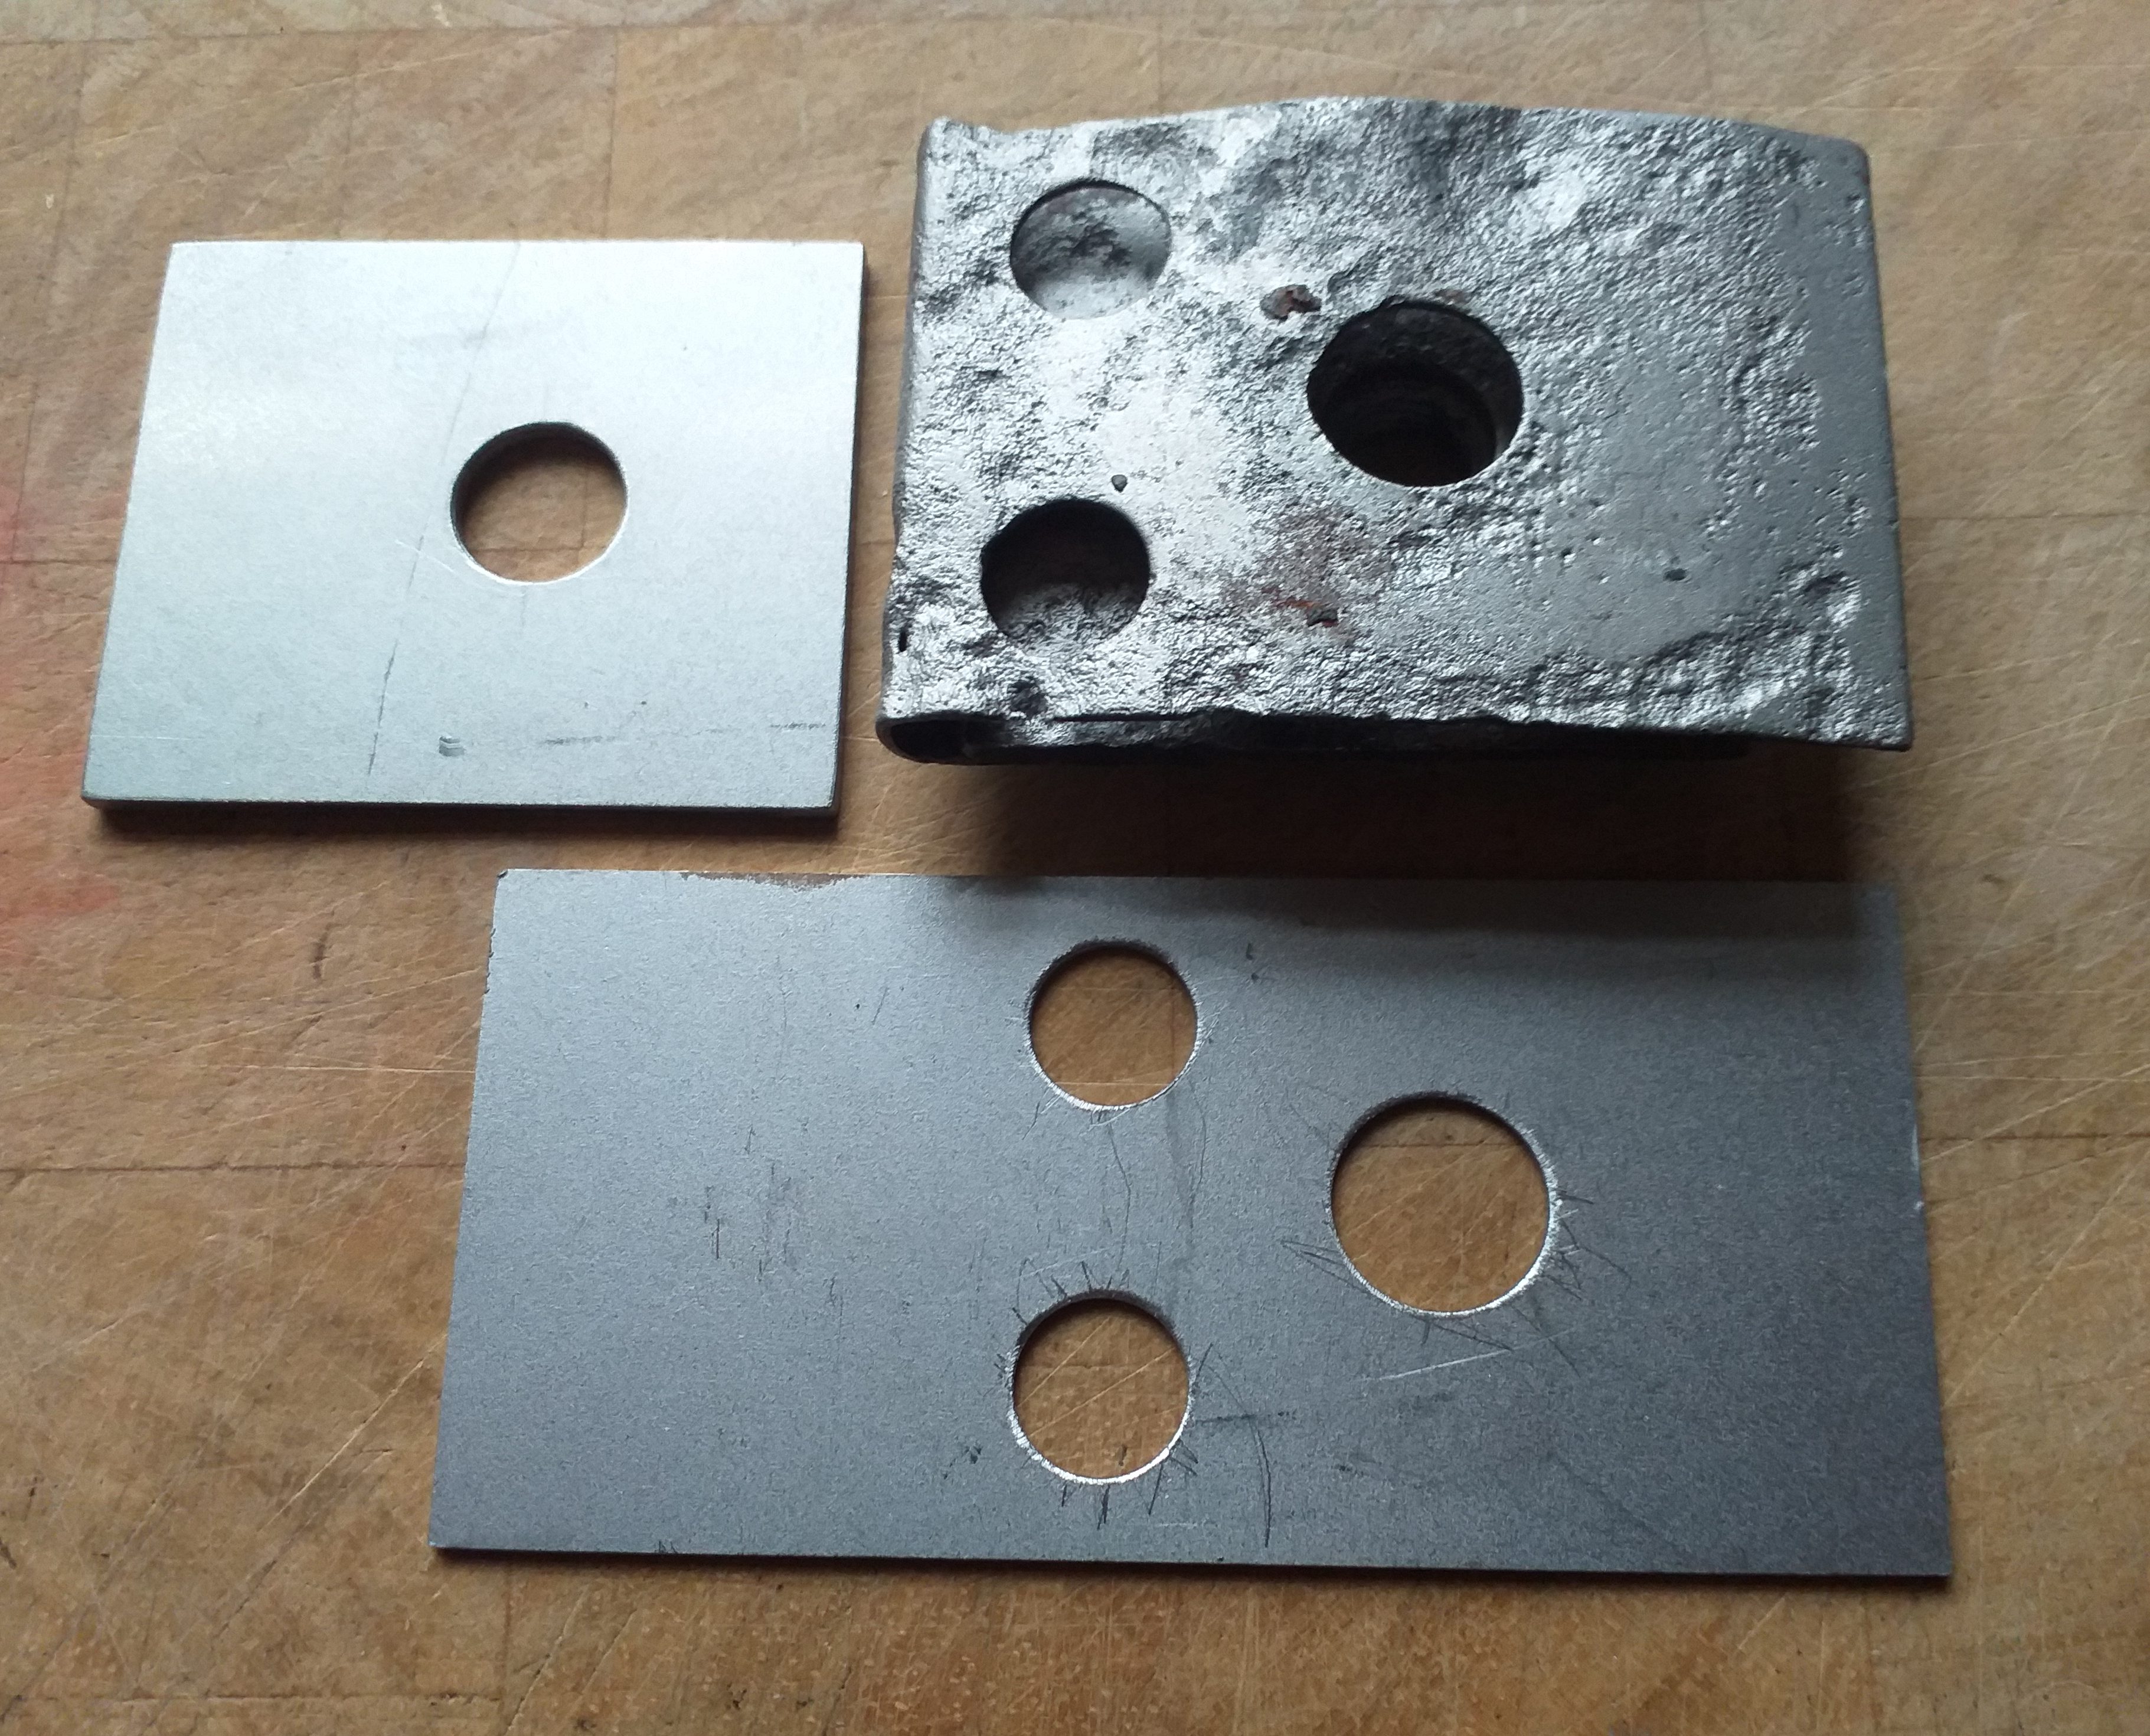
Another project I am slowly doing is making new clips. These clips go between the chassis and the body. Mine are in poor condition. So, I brought some steel plate the correct gauge, and had them laser cut to size.
私がゆっくりとやっているもう一つのプロジェクトは、新しいクリップを作ることです。これらのクリップは、シャーシと本体の間にあります。 私のクリップの状態は良くありません。それで、私はいくつかの鋼板を正しいゲージに持ってきて、それらをサイズにレーザーカットさせました。

I have been drilling the holes in the plates. The nut requires cutting down to be the correct height. All done on my lathe.
プレートに穴を開けています。 ナットは正しい高さにカットダウンする必要があります。 すべて私の旋盤で行われました。


I had my bumper brackets yellow zinc plated. Mainly to get some rust protection between the plates that make up the bracket. Then I had them powder coated.
バンパーブラケットに黄色の亜鉛メッキを施しました。 主に、ブラケットを構成するプレート間の防錆のためです。 それから私はそれらに粉体塗装をしてもらいました。

Radiator fan now powder coated in colour close to original.
ラジエーターファンは、オリジナルに近い色で粉体塗装されました。

More NOS parts arrived, SP311 mainly. The engine wiring loom will be used as a basis for the making of a new CSP311 wiring loom, as quite a lot of wires and connectors are the same.
より多くの新古品、主にSP311が到着しました。 エンジンワイヤリングルームは、非常に多くのワイヤとコネクタが同じであるため、新しいCSP311ワイヤリングルームを作成するための基礎として使用されます。


Somewhere in the blog pages, I posted a picture of a footrest I was making. After a long time, as I have many small projects all going on (in different stages of completion) I have finished.
A parts option for the 1967 SR311 was a footrest, part number 74340-25500. Mine is a replica I have made, using a footrest that was standard or an option (depending on sales market) of the Fairlady S30. Technically the footrest should not be put on my CSP311, but the Silvia was still in production then, the Silvia is based on the same SP311 floor. For me it is correct for the period. And it looks great!.
ブログのどこかに、自分が作っているフットレストの写真を投稿しました。 多くの小さなプロジェクトが(完了のさまざまな段階で)進行しているという事実のために、私はフットレストを完成させました。
1967 SR311の部品オプションは、フットレスト、部品番号74340-25500でした。 私のレプリカは、フェアレディS30の標準またはオプション(販売市場に応じて)のフットレストを使用して作成したレプリカです。 技術的にはフットレストを私のCSP311に置くべきではありませんが、シルビアはまだ生産中であり、シルビアは同じSP311フロアに基づいています。 私にとって、それはその期間に正しいです。 そして、それは素晴らしく見えます!
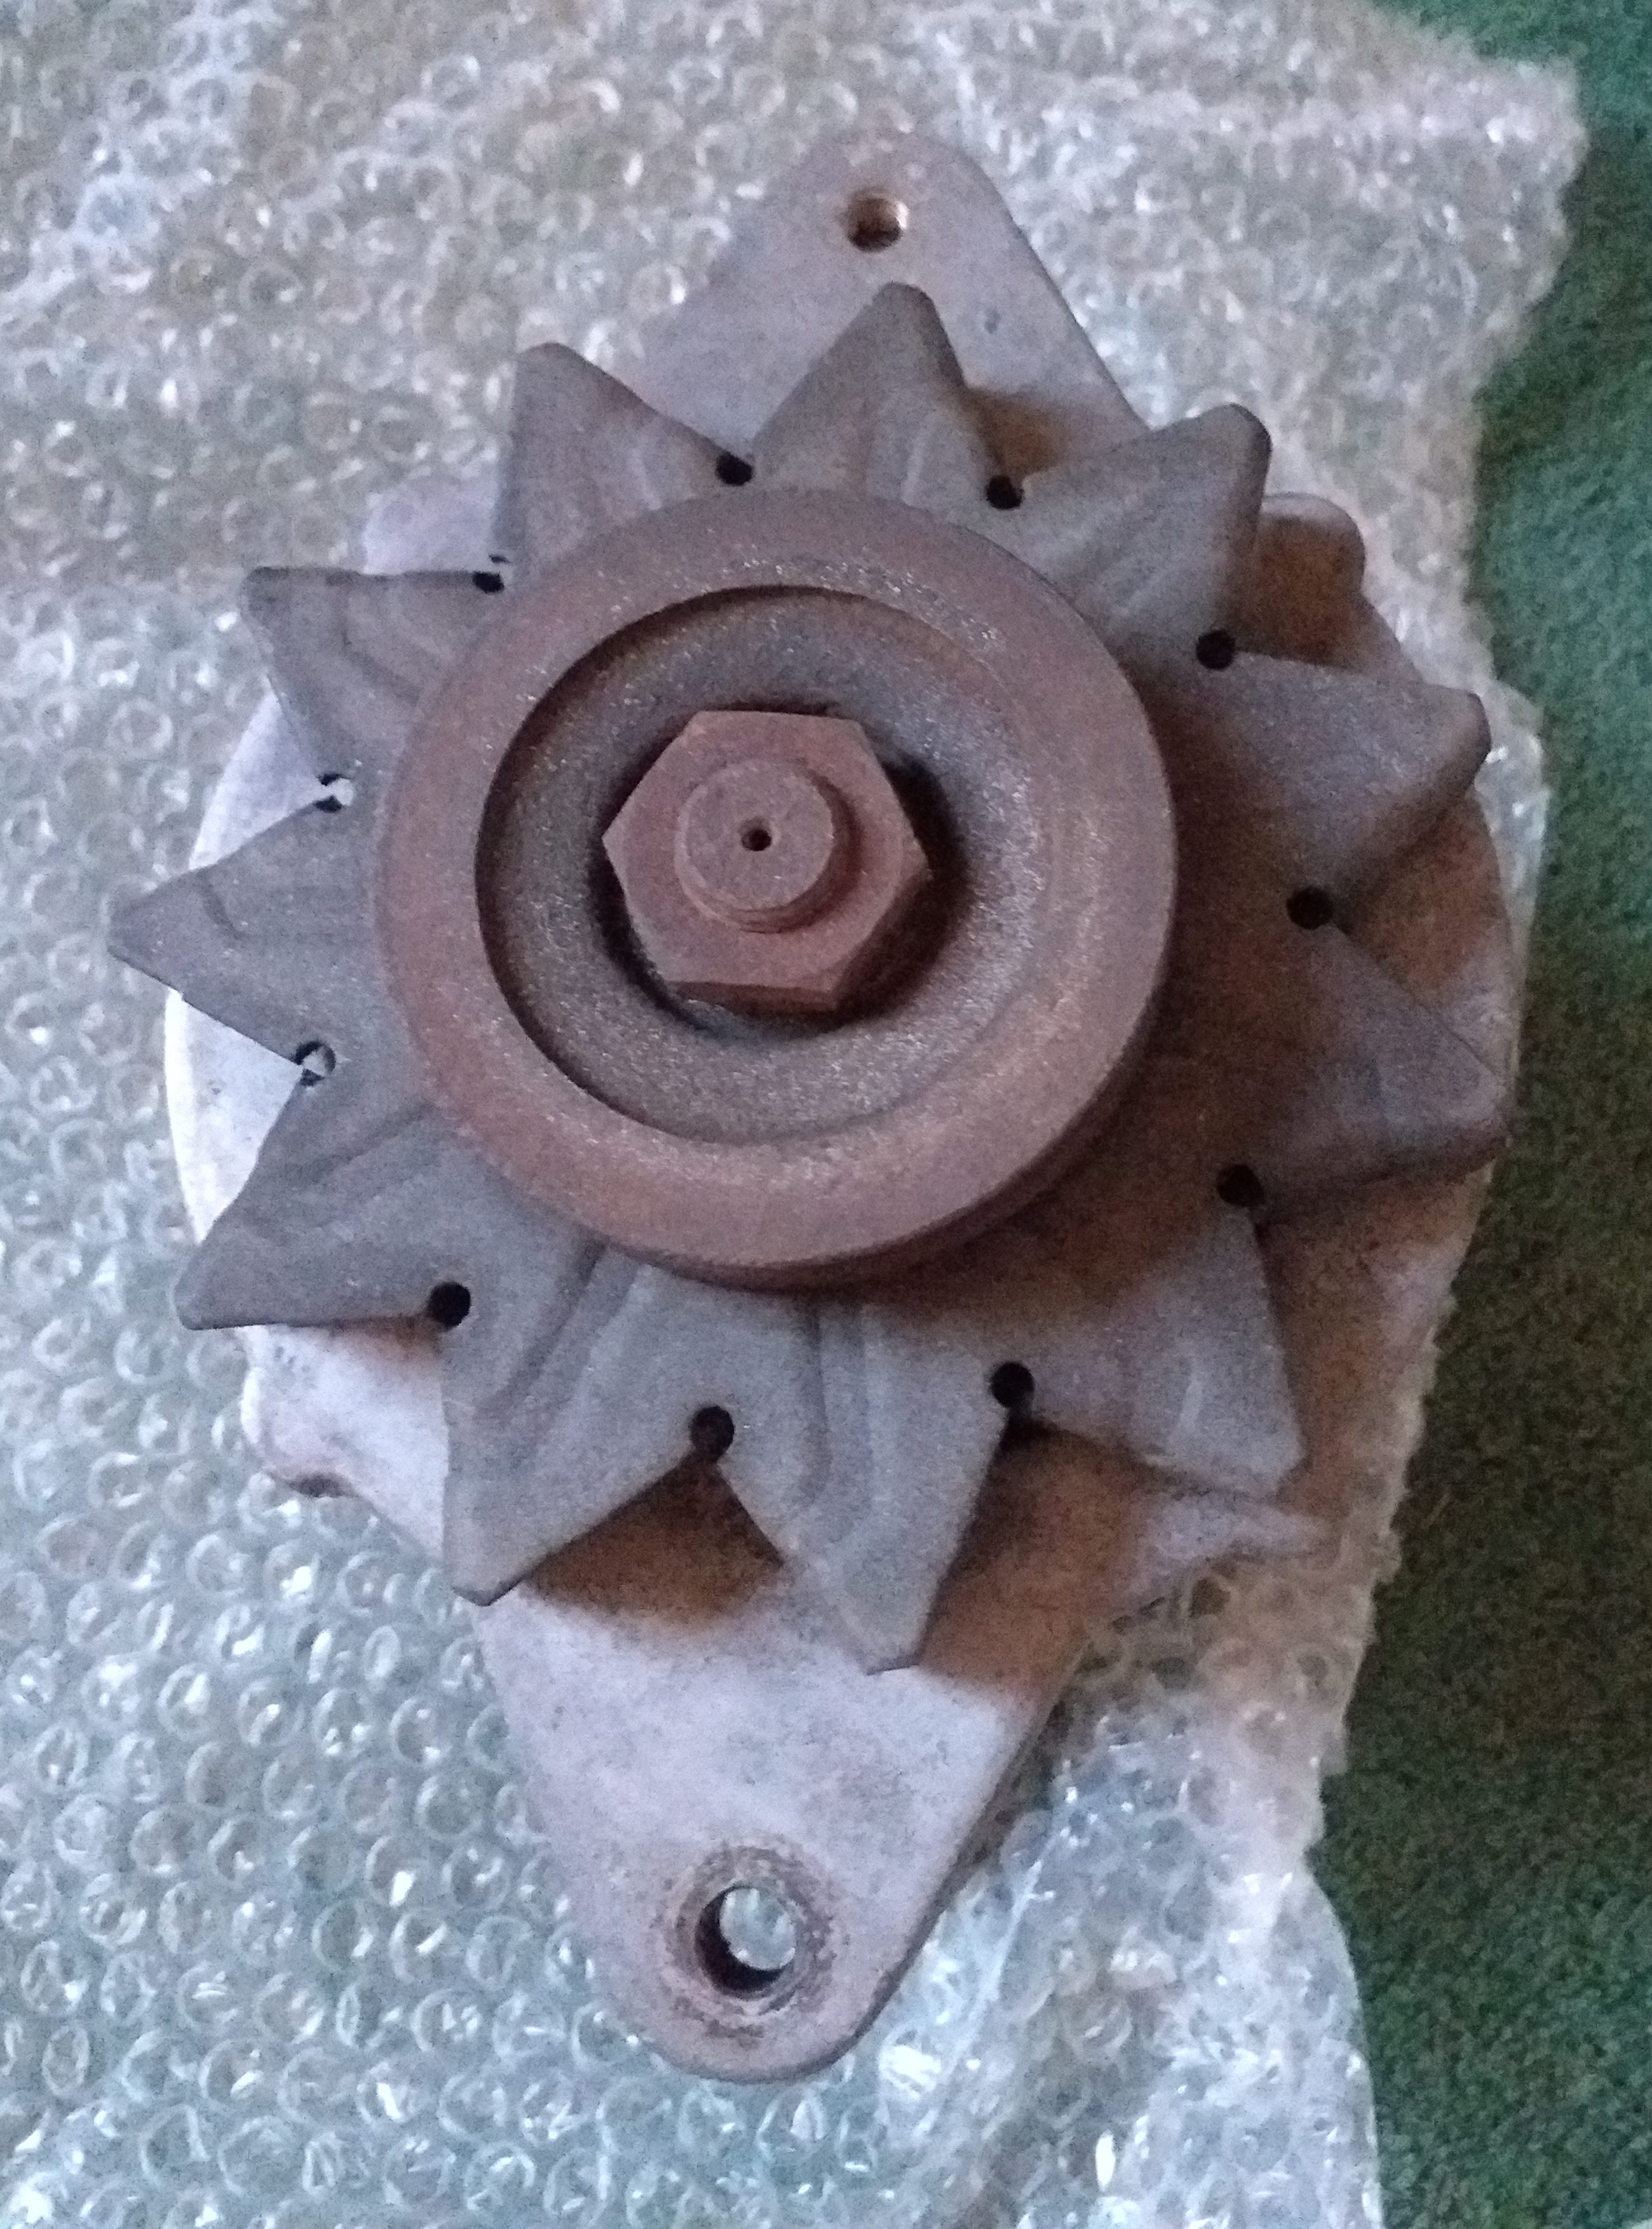
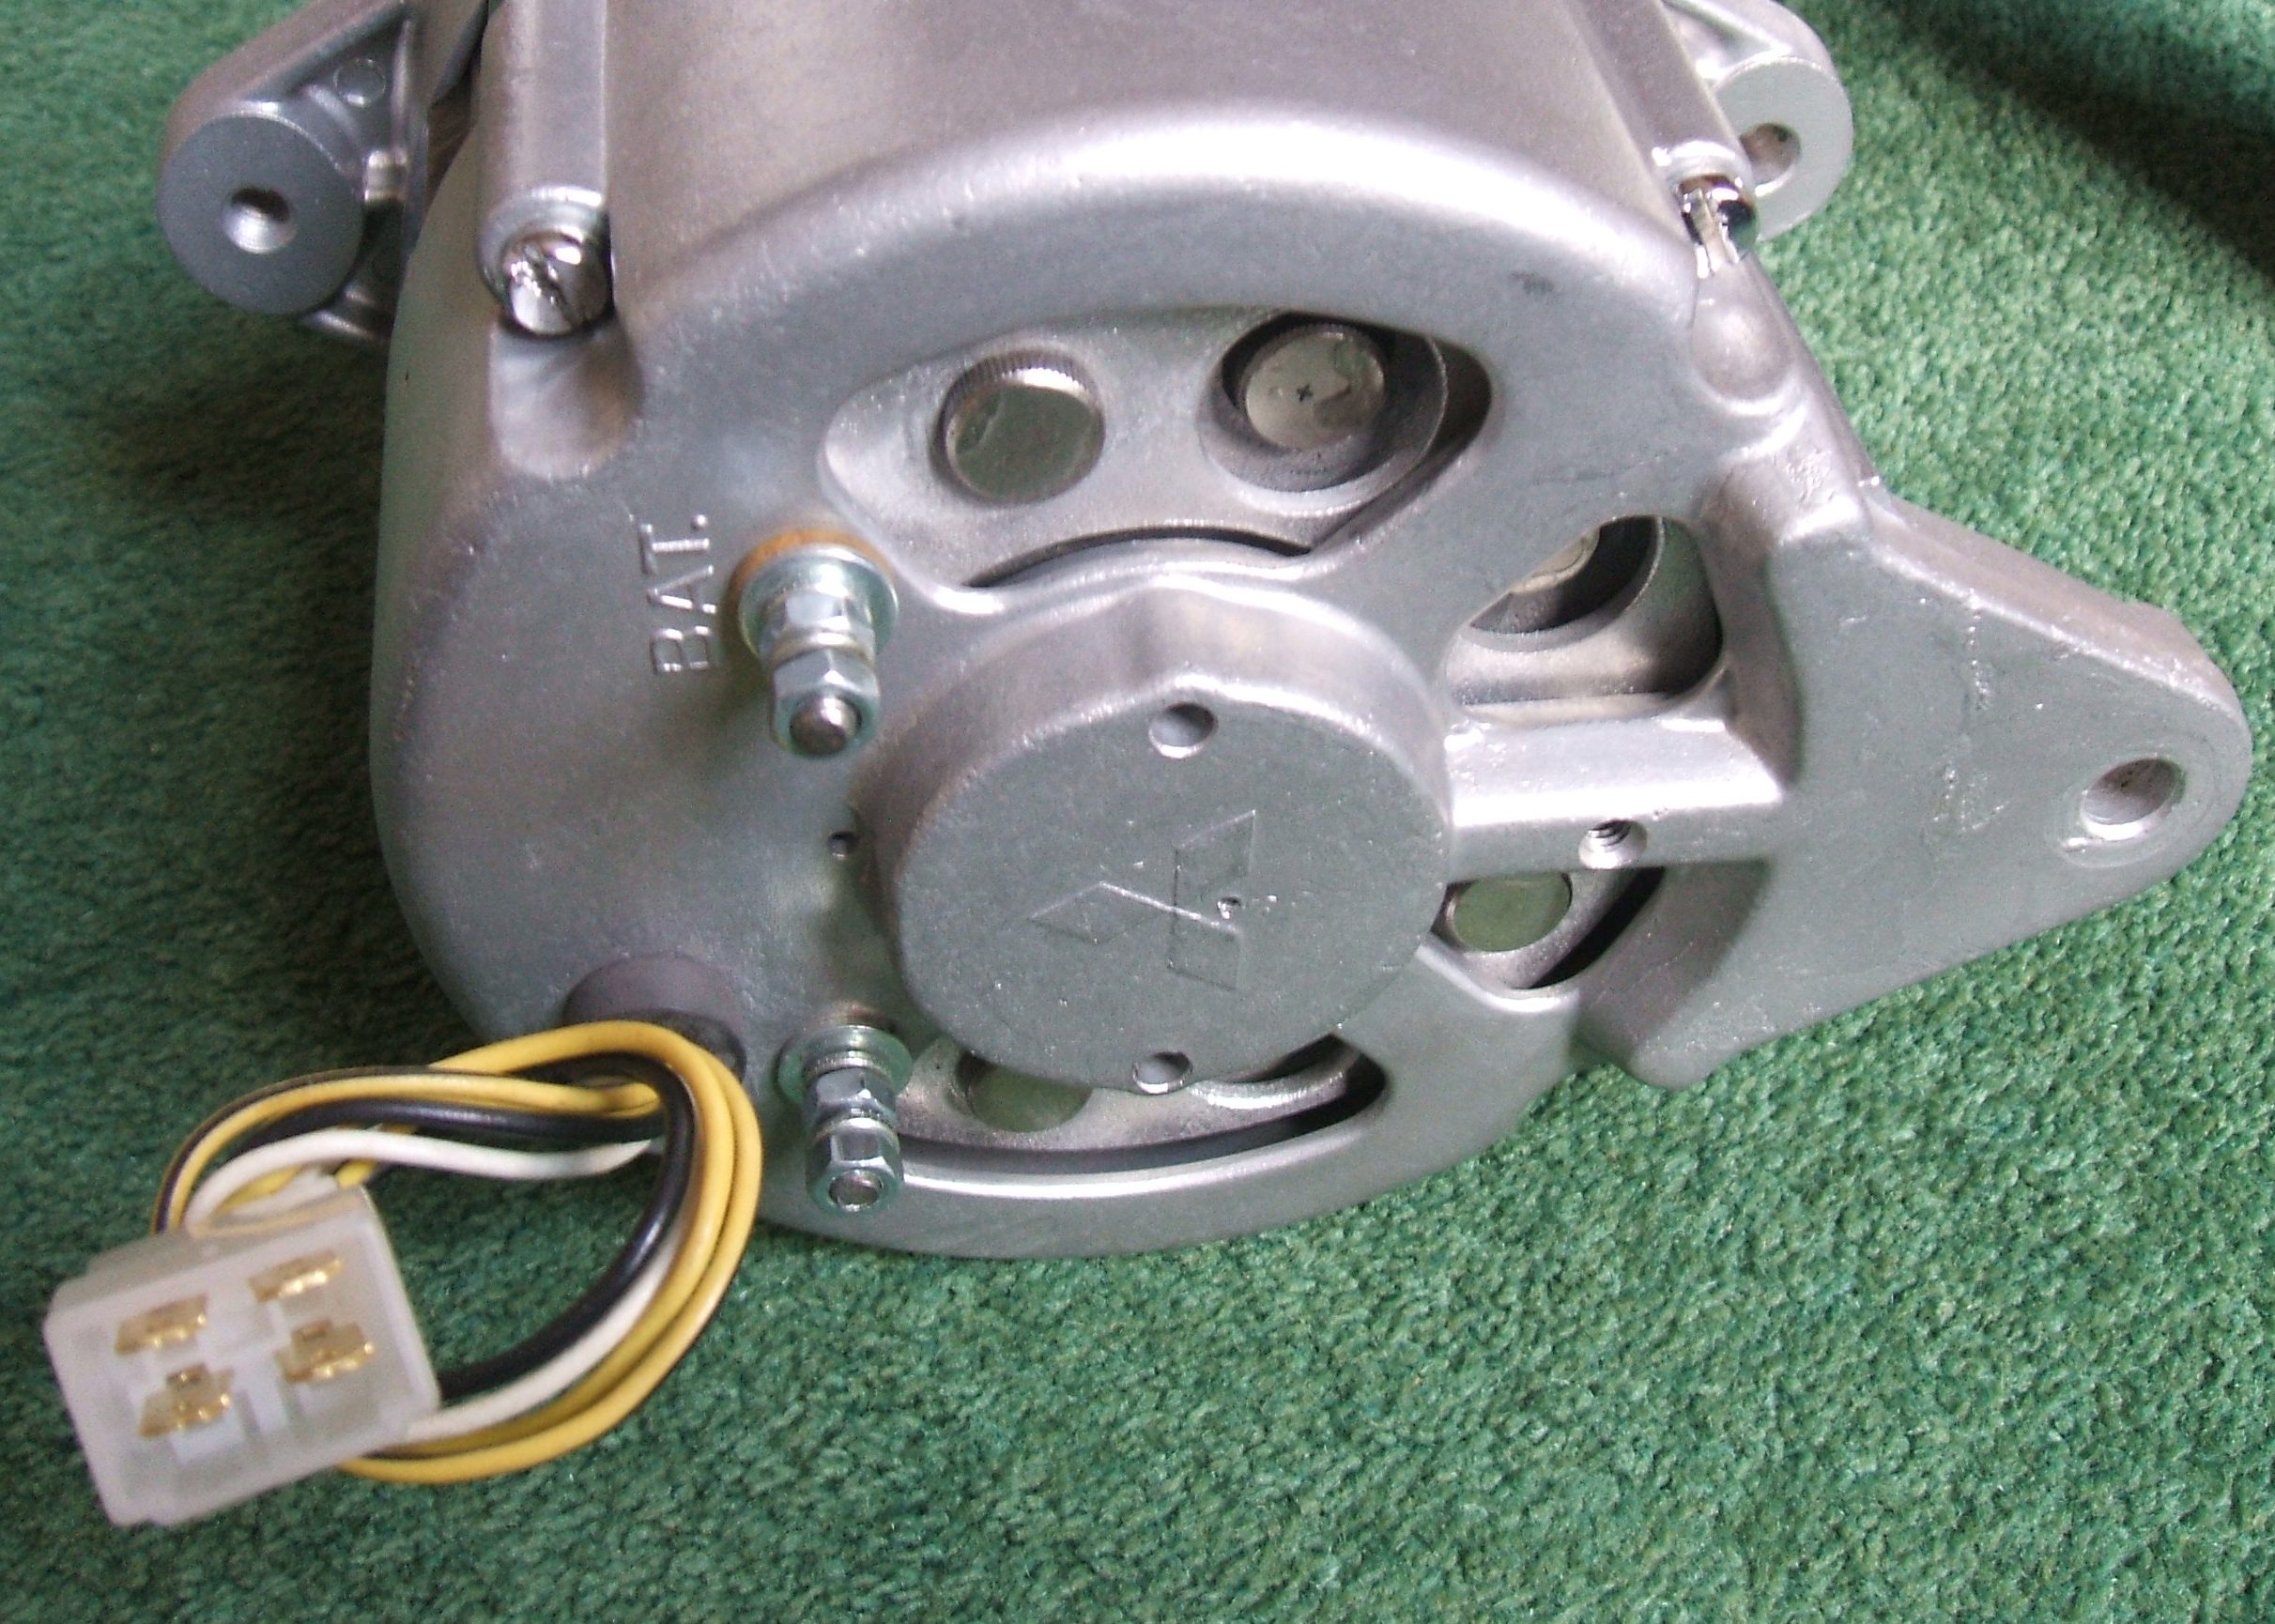
I brought this Mitsubishi alternator from Yahoo Japan. It may not be quite the correct model, but it is close. And it was only £6 (1000¥)! It has been completely rebuilt. The casings vapour blasted, parts yellow zinc plated and the internals rebuilt/replaced. New old stock wires (as per CSP wiring diagram) and new block connector.
この三菱オルタネーターをヤフージャパンから持ってきました。 完全に正しいモデルではないかもしれませんが、近いです。 そしてたったの£6(1000円)でした! 完全に再構築されました。 ケーシングは蒸気ブラストされ、部品は黄色の亜鉛メッキされ、内部は再構築/交換されています。新しい古いストックワイヤ(CSP配線図による)と新しいブロックコネクタ。
Before/前

After/後

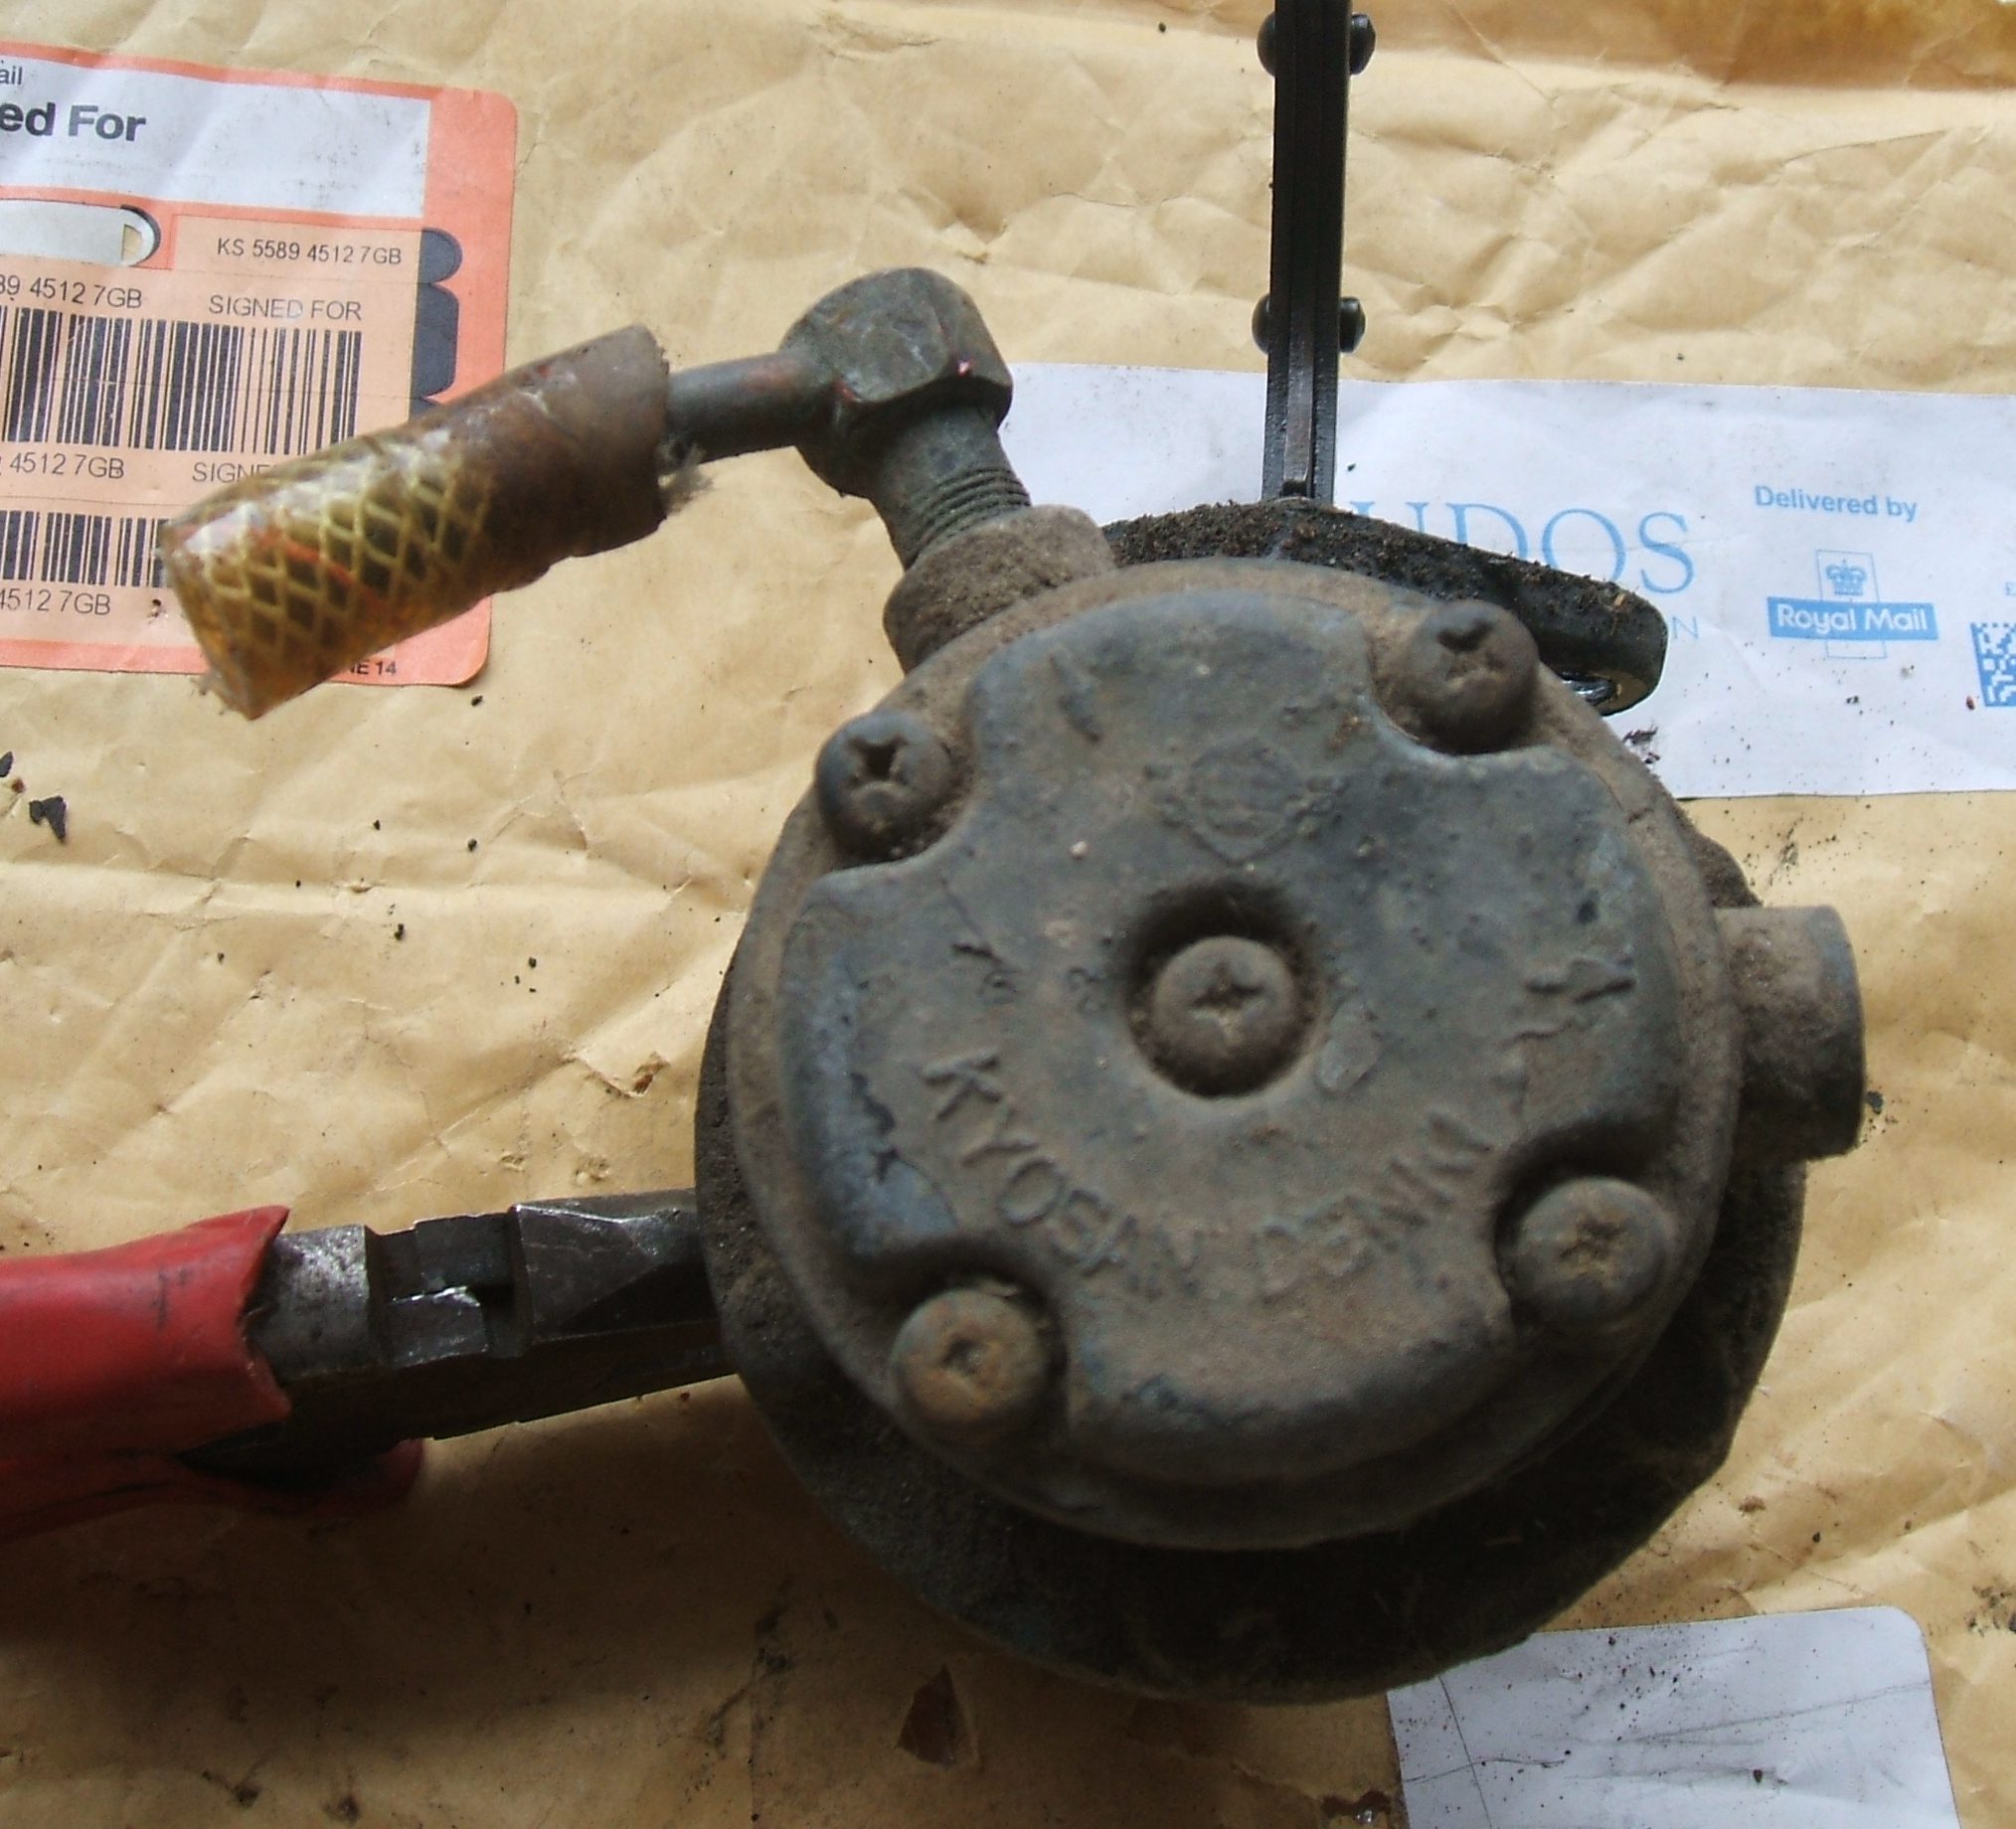
Next up for restoration is the fuel pump. Again vapour blasted then taken apart. Vapour blasted again to clean the inside. New valves, gaskets and plated screws.
次の修復は燃料ポンプです。 再び蒸気ブラストしてから分解しました。 内部をきれいにするために蒸気が再び吹き付けられました。 新しいバルブ、ガスケット、メッキネジ。
Before cleaning /掃除する前に

Parts ready to assemble/組み立ての準備ができている部品

Even though the pump gasket is correct, the holes did not line up.
ポンプガスケットは正しいのに、穴が一列に並んでいませんでした。

I punched the holes out with a hole punch.
ホールパンチで穴を開けました。

Assembling/組み立て


Seat side tilt mechanism back from chrome.
シート側のチルト機構が再クロムメッキされました。

More seat pictures. These brackets have now been repaired and powder coated in a colour very close to original. At some point, there was extra holes drilled. It made the bracket weak, and are not needed. Two pictures are of the bracket in place on the seat when I took it apart.
より多くの座席の写真。これらのブラケットは修理され、オリジナルに非常に近い色で粉体塗装されています。 ある時点で、追加の穴が開けられました。 それはブラケットを弱くし、必要としません。 2枚の写真は、シートを分解したときにシートに取り付けられていたブラケットの写真です。


I has missing the top door trim. Bought one from Yahoo Japan auctions. Thank you seller!
トップドアトリムがありません。 ヤフオク!オークションから購入しました。 販売者に感謝します!

Since I had the alternator rebuilt (above), I had the new voltage regulator checked over and calibrated to the alternator. Wiring to finish.
オルタネーターを再構築したので(上記)、新しい電圧レギュレーターをチェックして、オルタネーターに合わせて調整しました。 配線を終えなければなりません

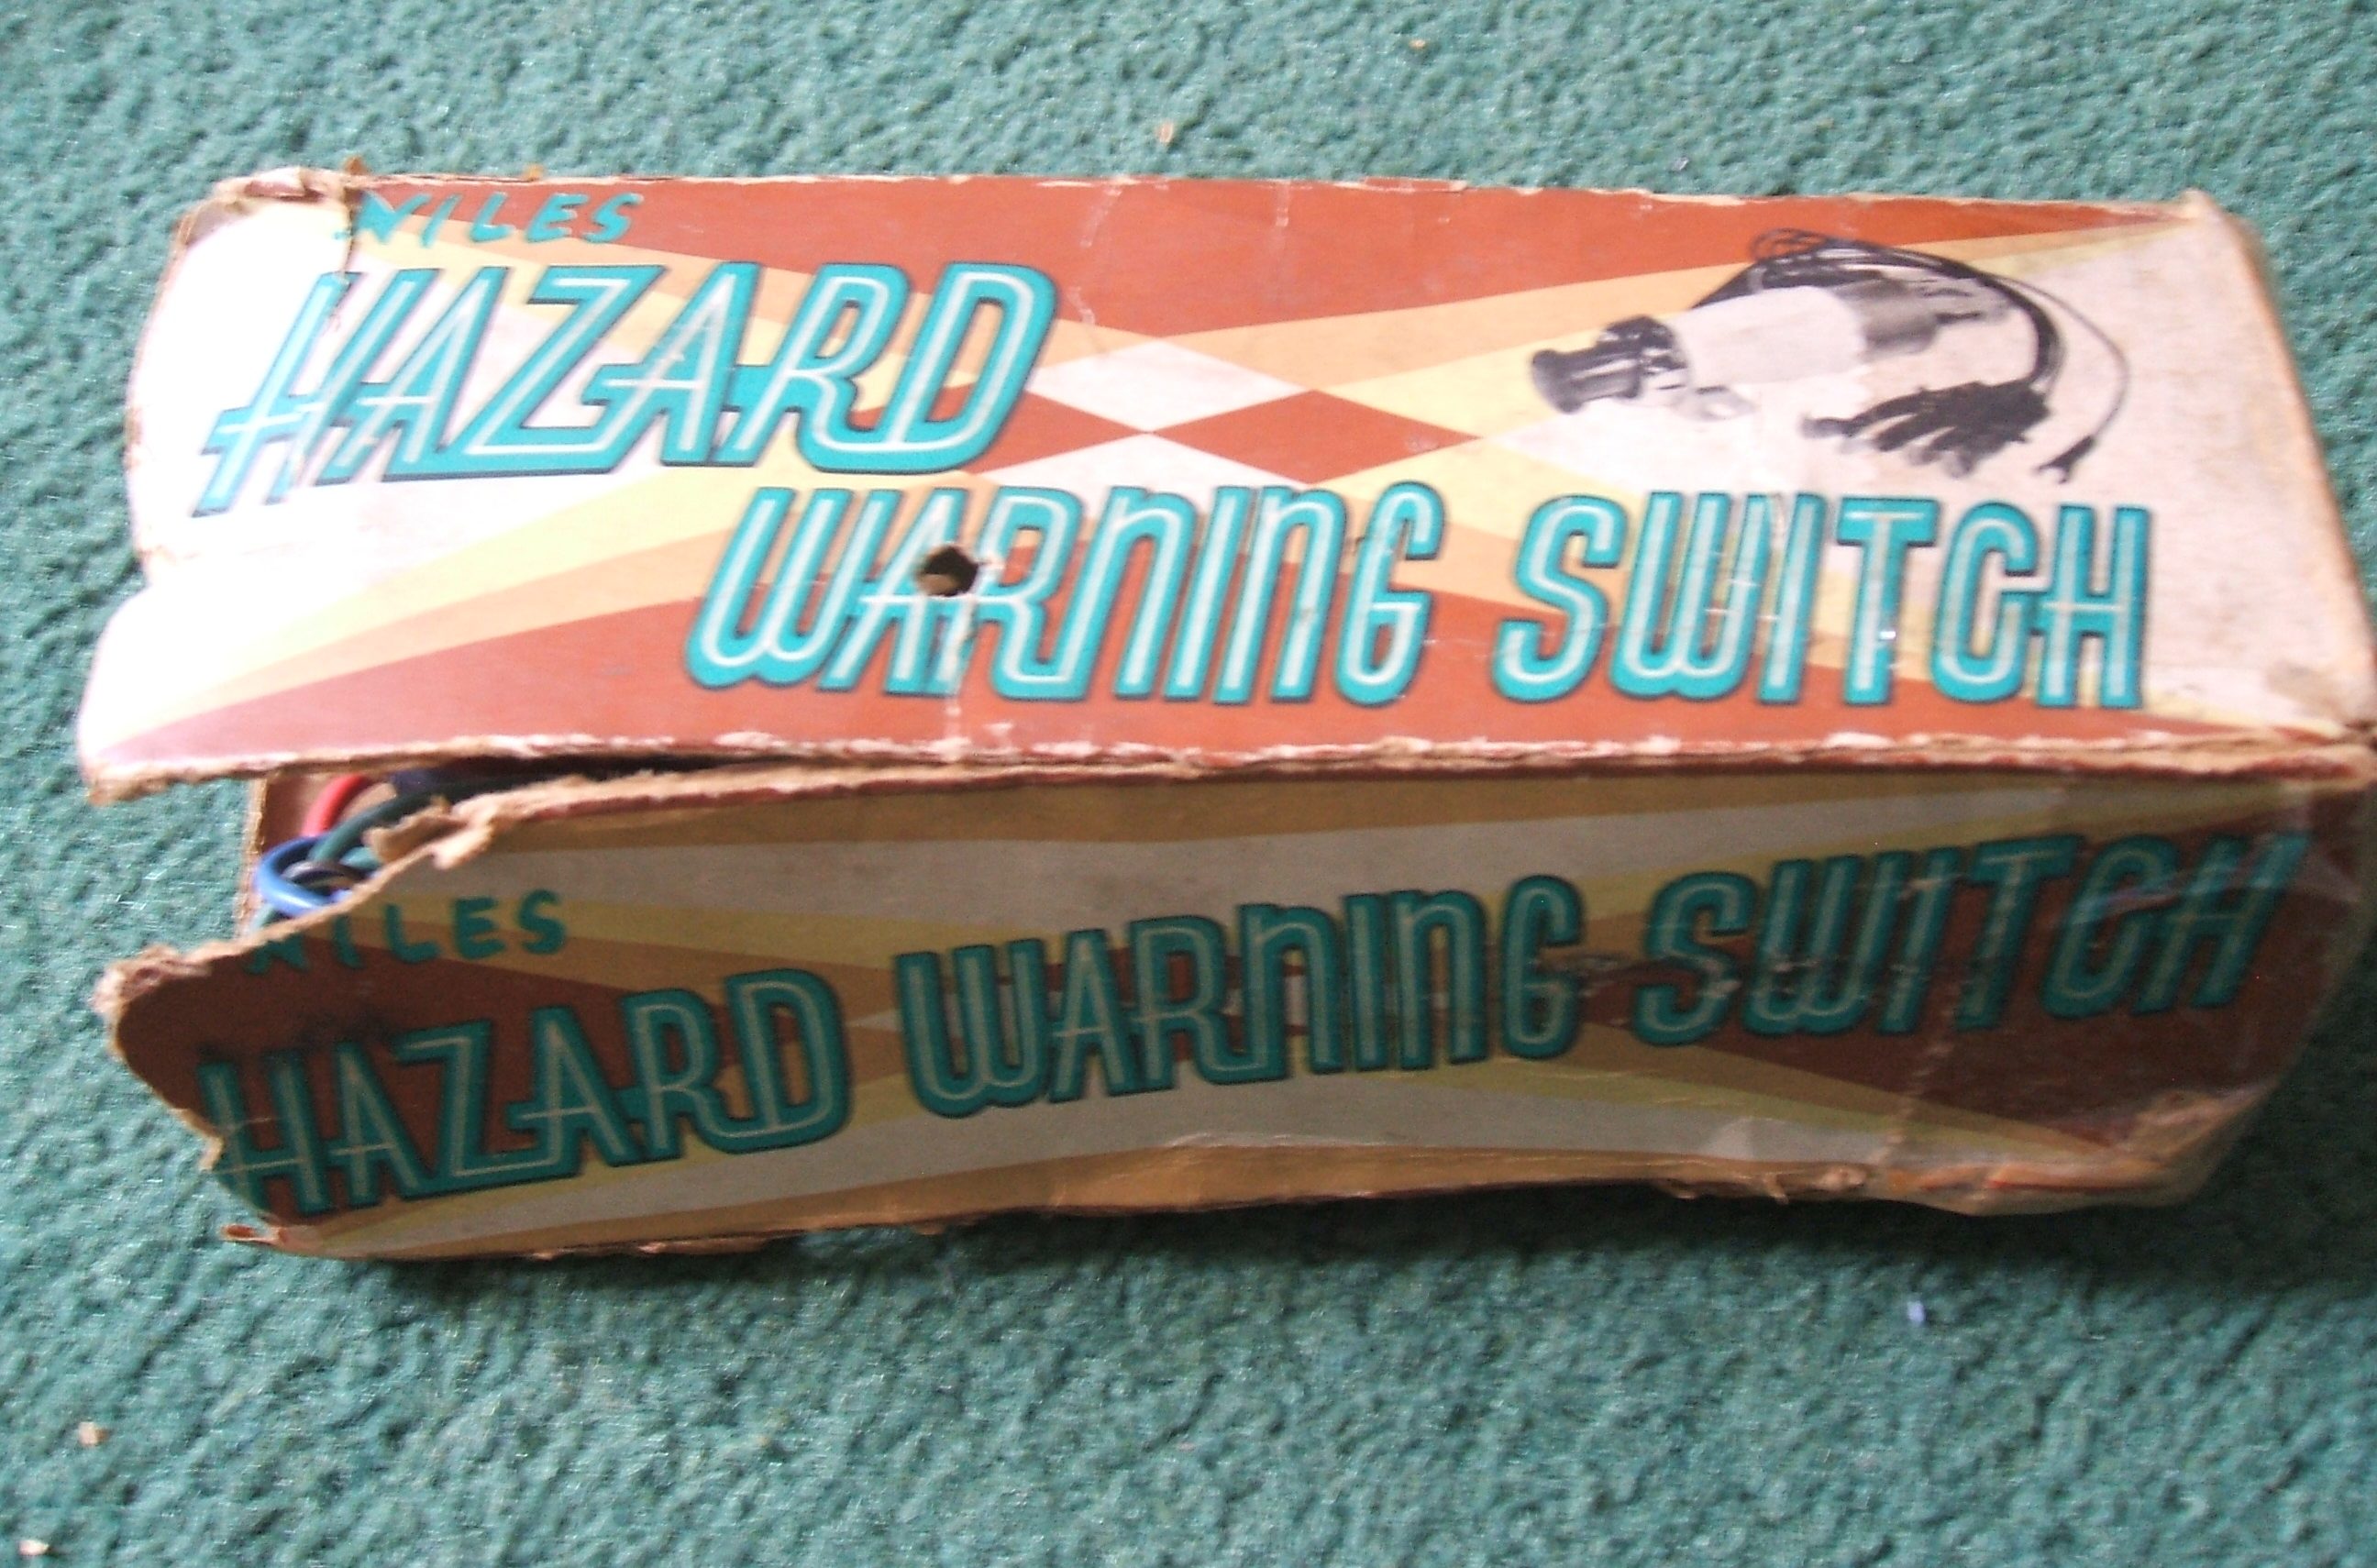
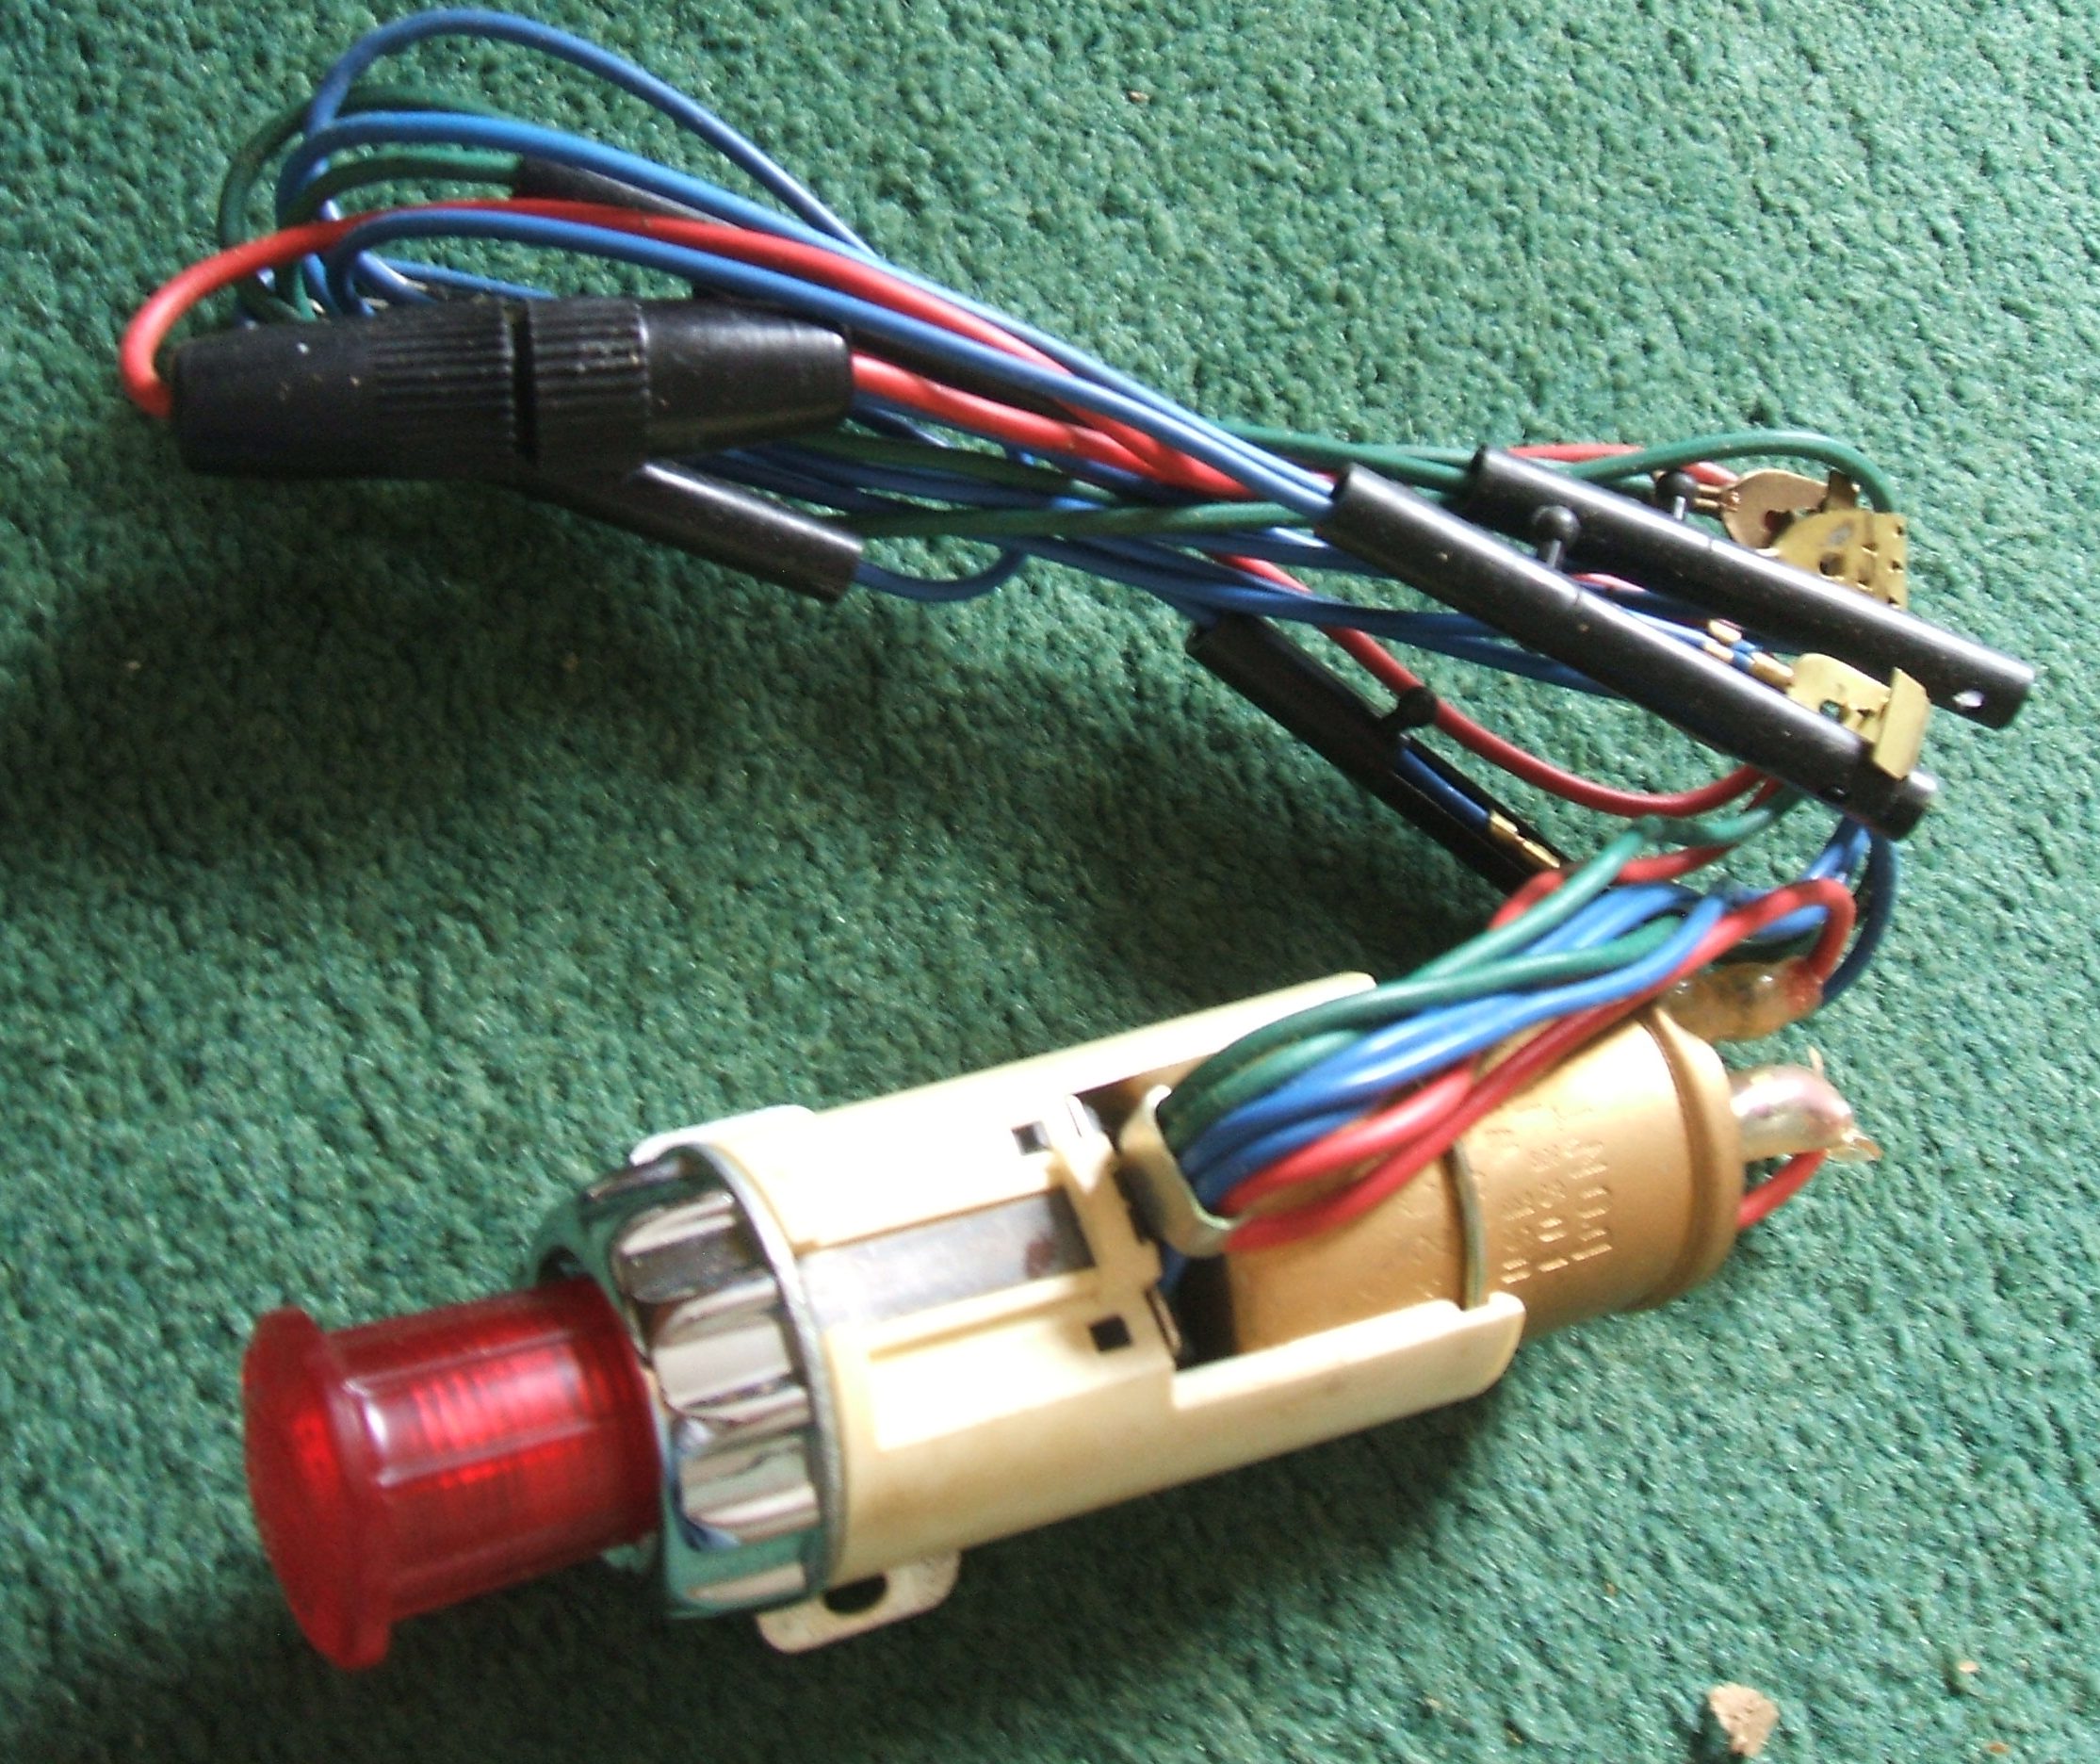
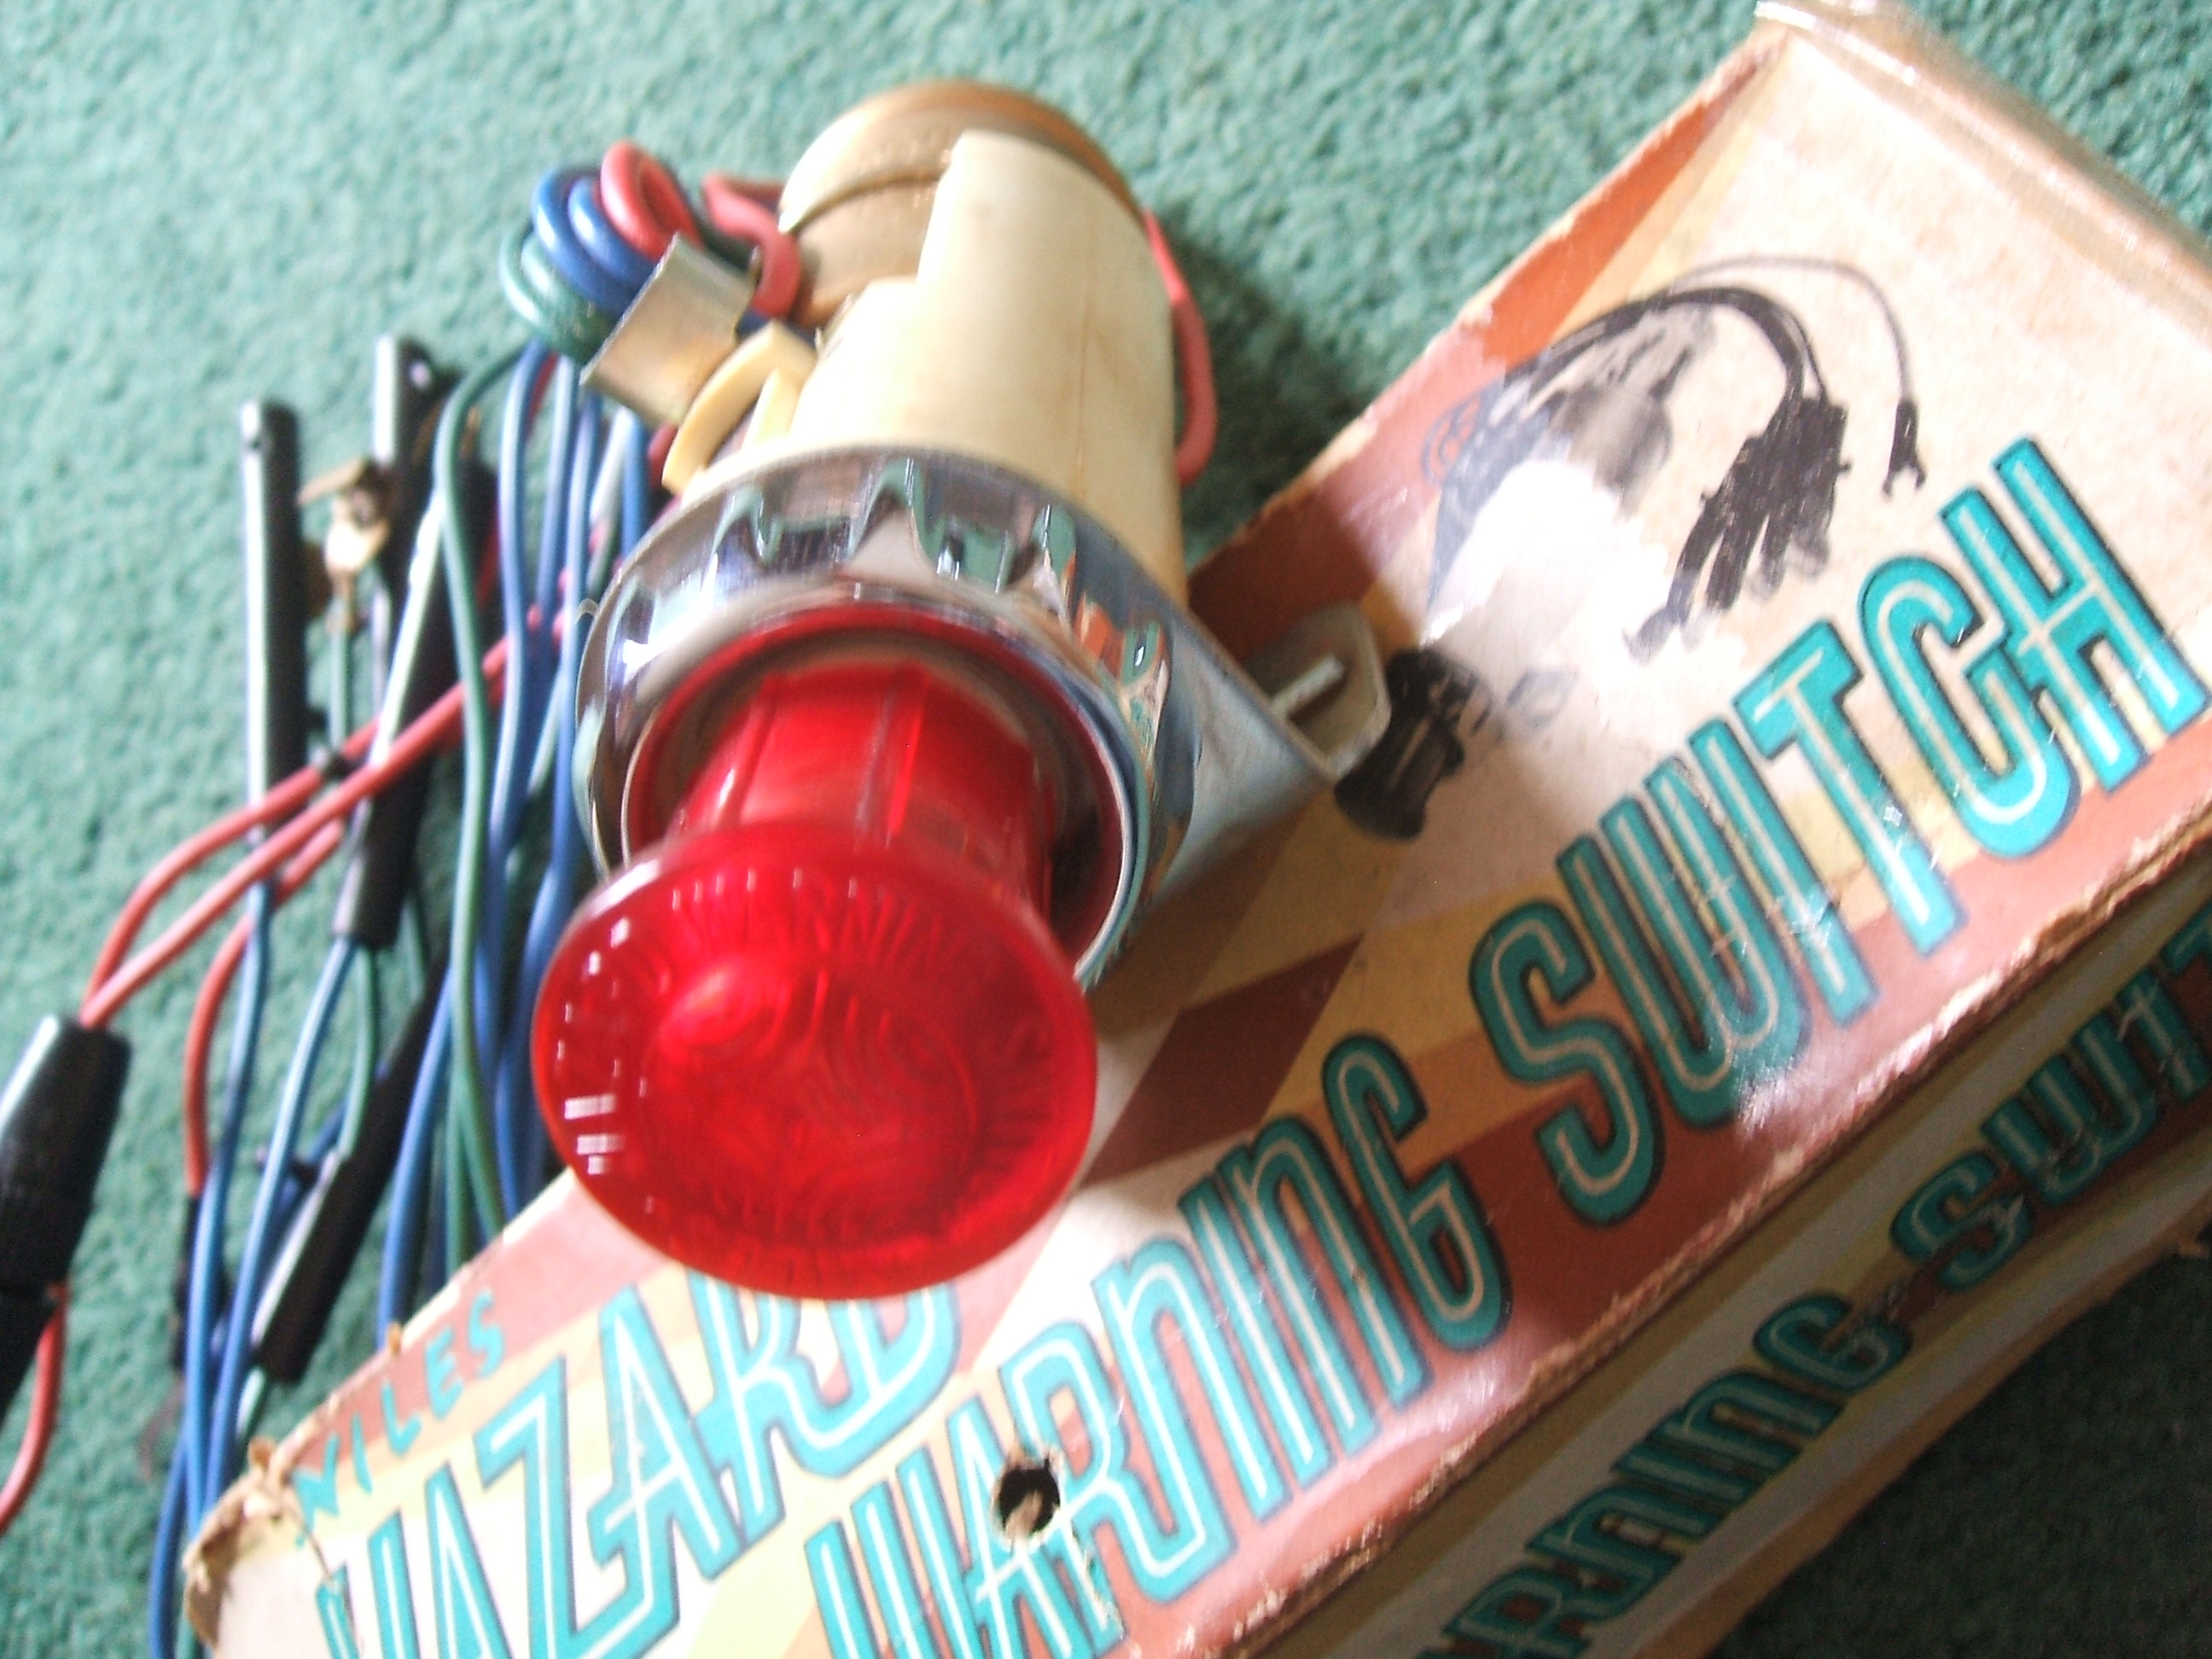
The CSP311 does not come with a hazard warning switch or flashing lights. So, I brought this period one made by Niles. Niles makes some of the electrical switches, like the indicator stalk. I plan to install this into the car when it is time.
CSP311 には、ハザード警告スイッチや点滅ライトは付属していません。 というわけで、ナイルズ製のこの時代のものを持ってきました。 ナイルズは、CSP に見られるインジケーターの茎など、いくつかの電気スイッチを製造しています。 時期が来たら車に取り付けようと思います。
I have many small jobs to do on my Silvia restoration. The one I chose to do this time was the rear light wiring. My original wiring loom for the rear lights is old, has a little corrosion and the rubber is hard. The wiring works but for how long? I want the lights to work all the time and not have poor connection.
シルビアの修復に関して、やるべき小さな仕事がたくさんあります。 今回選んだのはリアライトの配線。 リアライト用のオリジナルの配線織機は古いもので、腐食が少しあり、ゴムが固くなっています。配線は機能しますが、どのくらいの期間使用できますか? ライトが常に機能し、接続不良が発生しないようにしたい.


A few years ago, I brought some SP/SR311 rear light connectors, in the view to sell on. But I noticed the wiring bulb holder was similar to the CSP’s. The SP/SR311 bulb holder would fit if a small part was removed.
数年前、販売を目的として、SP/SR311 リアライト コネクタをいくつか持ってきました。 しかし、配線用の電球ホルダーが CSP のものに似ていることに気付きました。SP/SR311 電球ホルダーは小さな部品を取り外せば収まります。


Now they fit. 今、彼らは合います。

I planned to keep the light connections that plug into the rear loom. But wire the SP/SR311 bulb holders onto that part. But some of the original bullet wiring connectors needed tidying up. The bare wire was too long. It is a weak point and possible electrical short. So, the bullet connectors were un-soldered, cut to length, then re-soldered back on.
後部織機に差し込むライト接続を維持する予定でした. その部分にSP/SR311の電球ホルダーを配線しますが。 しかし、元の弾丸配線コネクタのいくつかは片付けが必要でした. 裸線が長すぎました。 弱点であり、電気的ショートの可能性があります。 そのため、弾丸コネクタははんだを取り除き、長さにカットしてから、はんだ付けし直しました。

Then using correct style new bullet connectors the wiring was joined. I had only SP/SR311 connectors for tail/brake lights so I used them. I had no indicator SP/SR311 connectors. It just means I have a spare wire and have to use tail/brake bulbs for indicators.
次に、正しいスタイルの新しいブレット コネクタを使用して、配線を結合しました。テール/ブレーキランプのコネクタはSP/SR311しかなかったのでそれを使いました。 インジケータ SP/SR311 コネクタはありませんでした。 予備のワイヤーがあり、インジケーターにテール/ブレーキ電球を使用する必要があることを意味します。

Recently brought a new radio antenna for my CSP311. It is new, but not an original fitment type. There are plenty of aftermarket antenna’s for sale. I like this one as it is semi automatic. Usually the key lifts the top tip of the antenna, then the users has to manually lift the antenna up. This requires the key to press the side of the tip, and the antenna spring up.
最近、CSP311 用の新しいラジオ アンテナを持ってきました。 新品ですが、オリジナルのフィッティングタイプではありません. 販売用のアフターマーケットアンテナがたくさんあります。 半自動なので気に入っています。 通常、キーはアンテナの先端を持ち上げます。その後、ユーザーは手動でアンテナを持ち上げる必要があります。 これには、キーを押して先端の側面を押す必要があり、アンテナが飛び出します。


I received the rear bumpers from my CSP311 back from being chrome plated.
CSP311 のリア バンパーをクローム メッキから受け取りました。

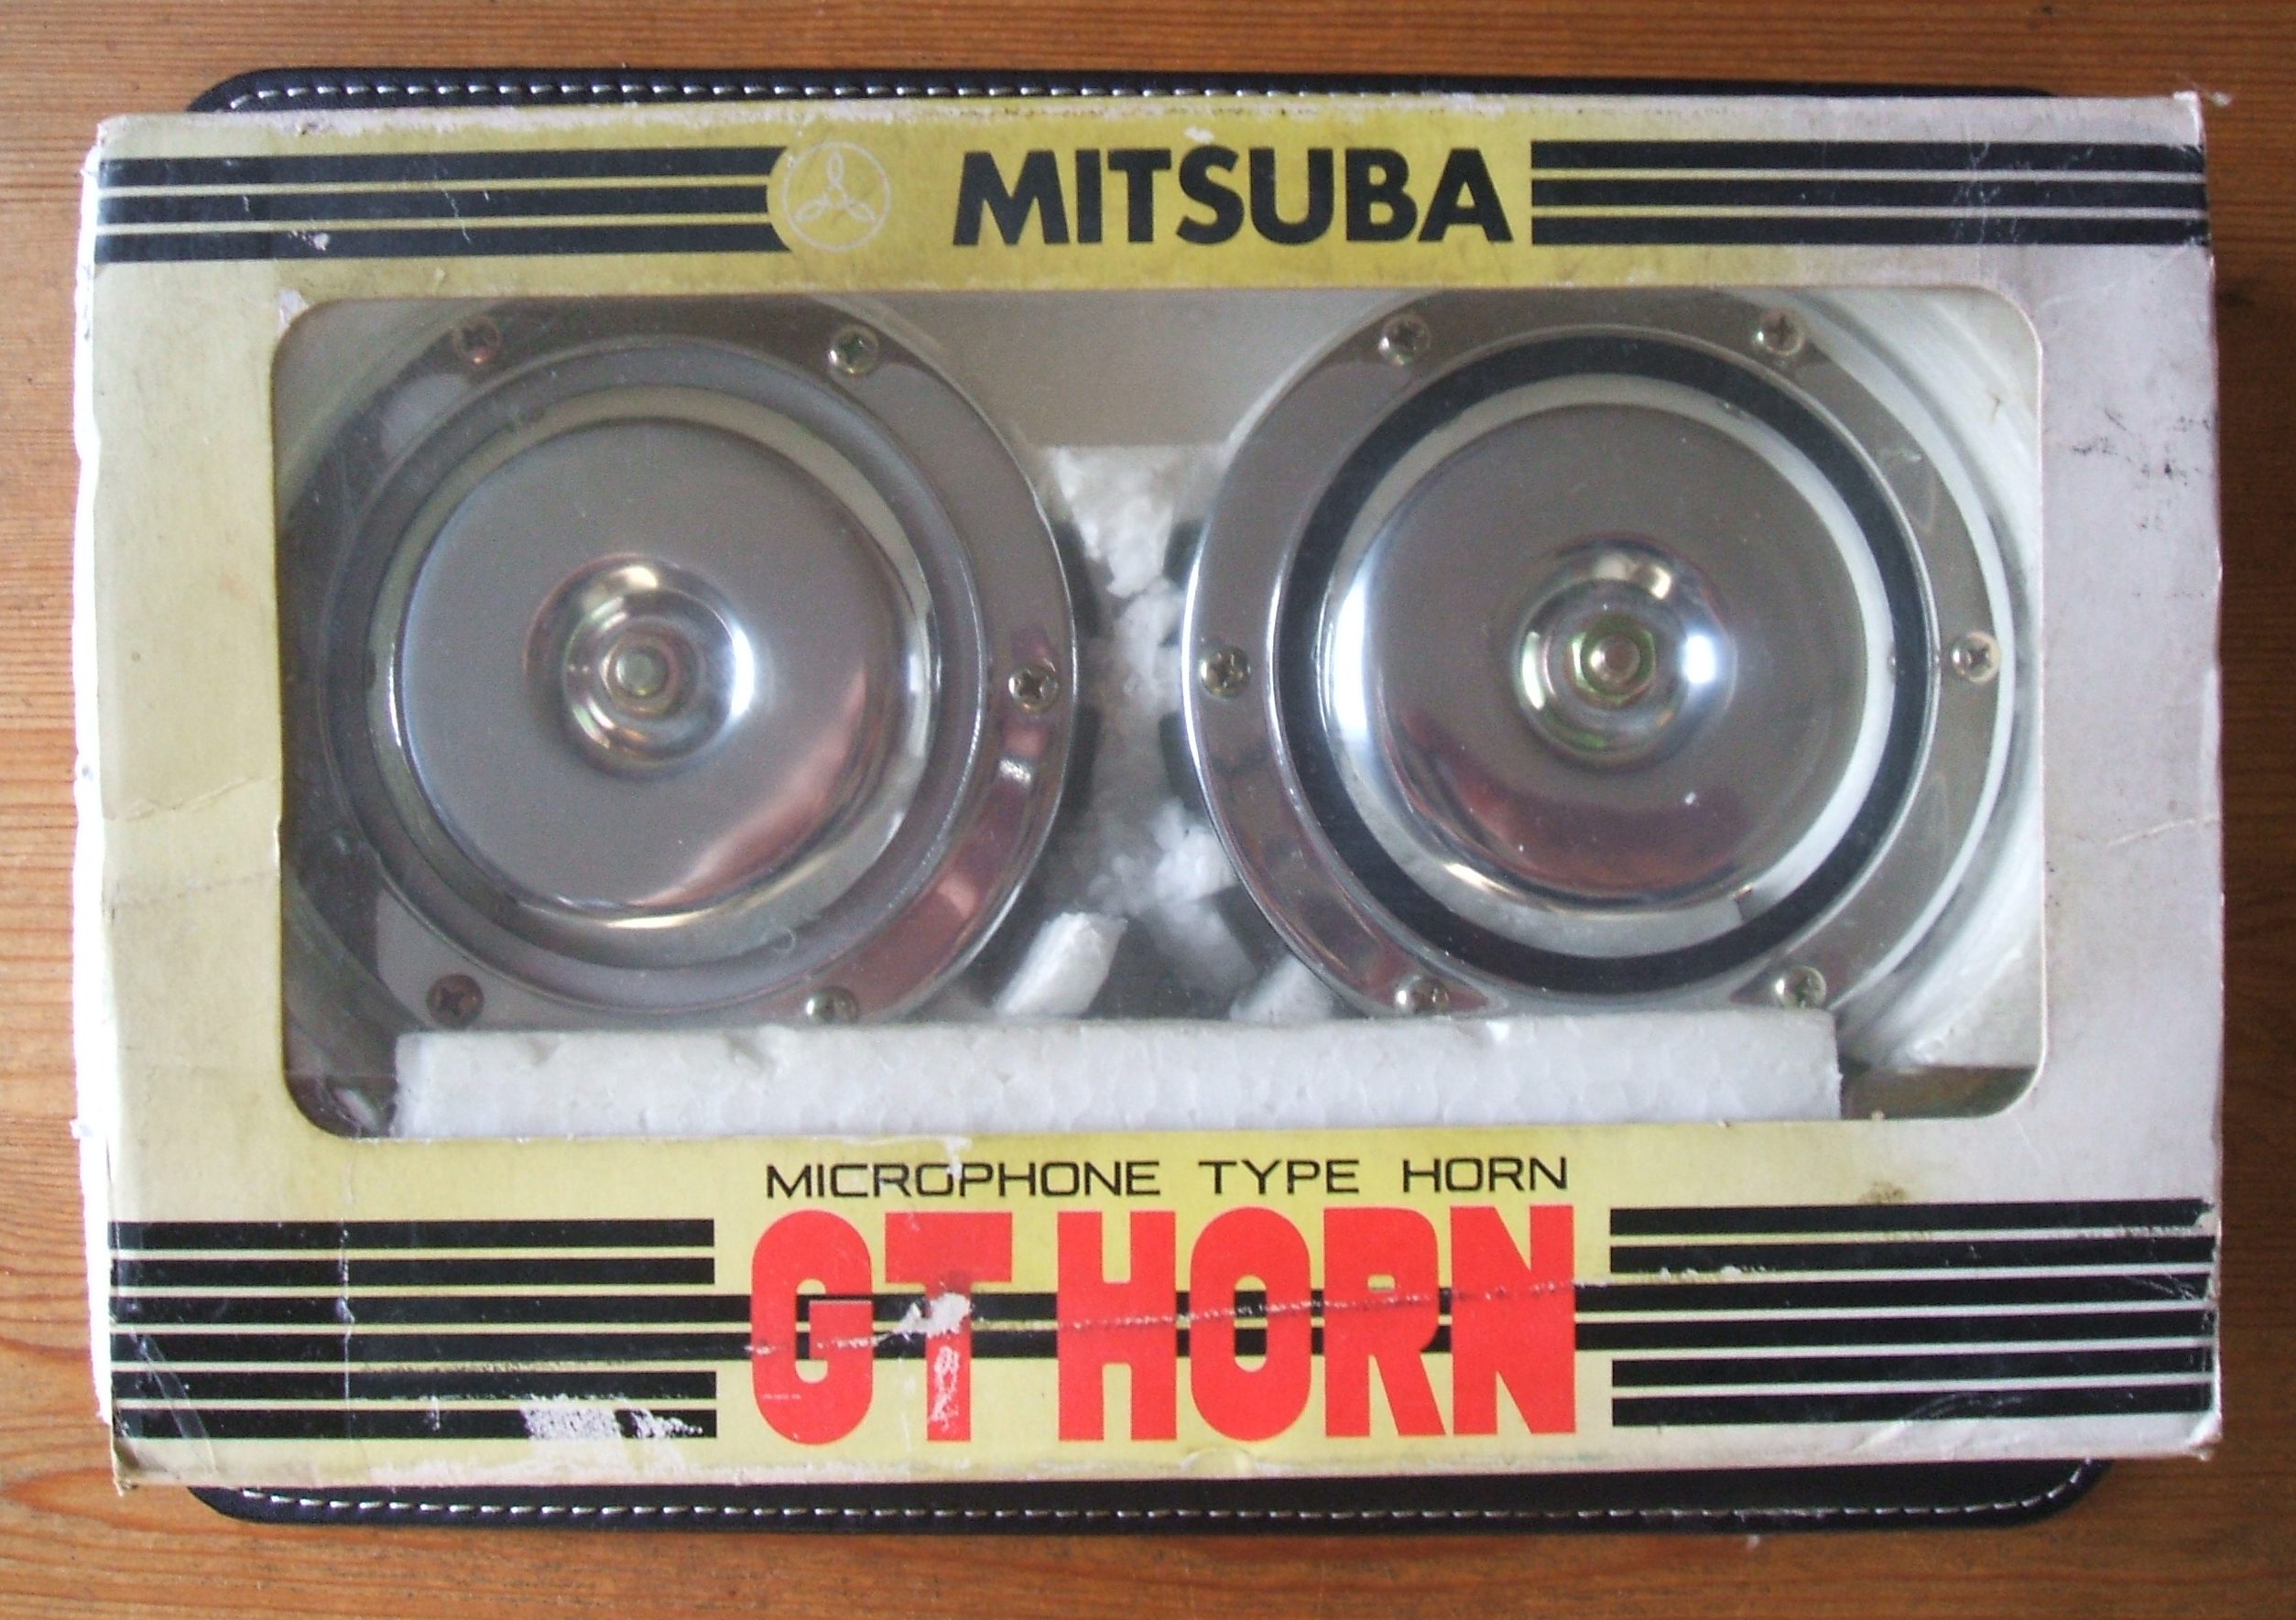
I also purchased a couple of items from Yahoo auctions Japan. A pair of aftermarket Mitsuda horns. They are not correct for the CSP311, but I like and may well use these. I have not decided. Also, a hazard torch, which is usually found on a few later Nissan models, such as the Fairlady S30. It is originally battery operated. I think I will see if I can get it converted to USB charging.
私もヤフオクで何点か購入しました。 アフターマーケットのミツダホーンのペア。 それらは CSP311 には正しくありませんが、私はこれらを気に入っており、よく使用する可能性があります。 私は決めていません。 また、通常、フェアレディ S30 などのいくつかの後期の日産モデルに見られるハザード トーチ。 もともと電池式です。 USB充電に変換できるかどうか見てみようと思います。


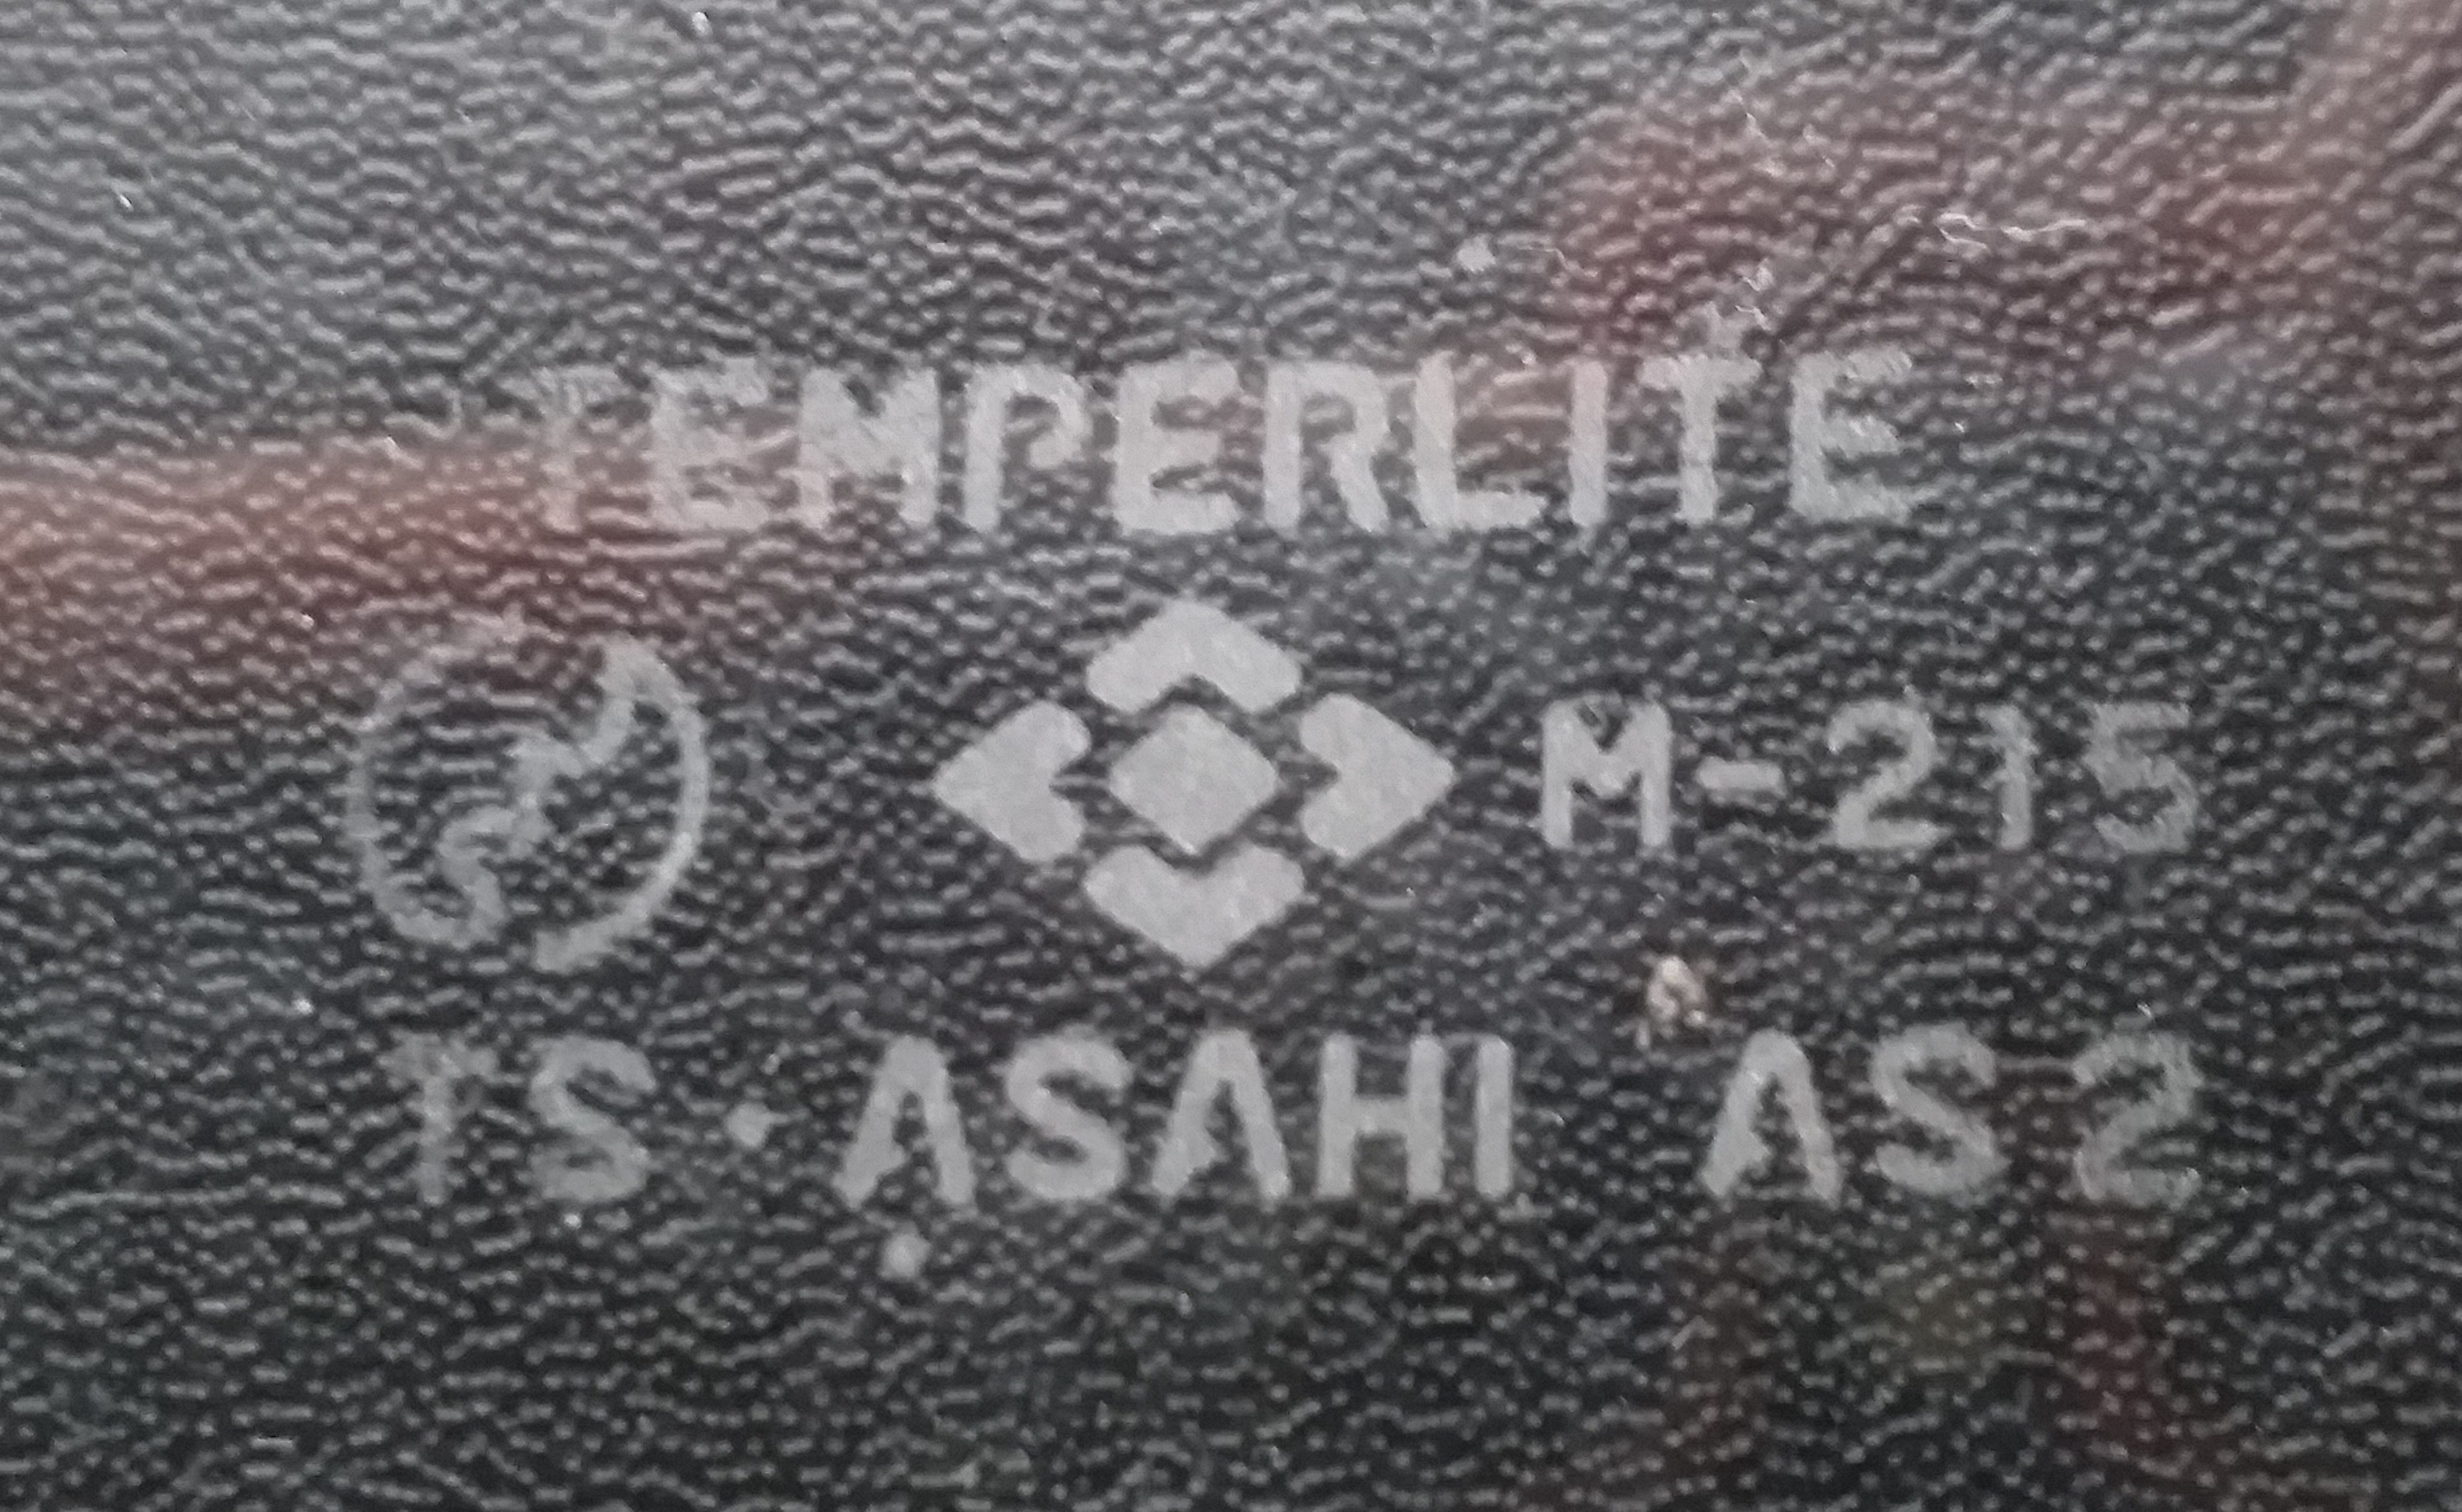
As I also own a S30Z, I frequent some of the web forums. An interesting topic came up, showing date codes on the factory fitted glass. This could help narrow down when the car was produced. I knew my CSP311 has etched marks, so I had a look.
私も S30Z を所有しているので、いくつかの Web フォーラムに頻繁にアクセスしています。 工場で取り付けられたガラスに日付コードが表示されているという興味深いトピックが浮上しました。 これは、車がいつ生産されたかを絞り込むのに役立ちます。 私のCSP311にはエッチングの跡があることを知っていたので、見てみました。
Here is my door quarter glass (below). Notice the small dots around the words “ASAHI” and “TEMPERLITE”. This is what inidicates which month and year the glass was made. It does not fully narrow down when the CSP was made by Nissan, but the glass must have been manufactured before the car.
これが私のドアクォーターガラスです(下)。 「ASAHI」と「TEMPERLITE」の周りの小さなドットに注目してください。 これは、ガラスが何年何月に作られたかを示すものです。 CSPが日産製だった頃は絞りきれませんが、自動車以前にガラスが製造されていたに違いありません。
Here is the guide I used. これが私が使用したガイドです。

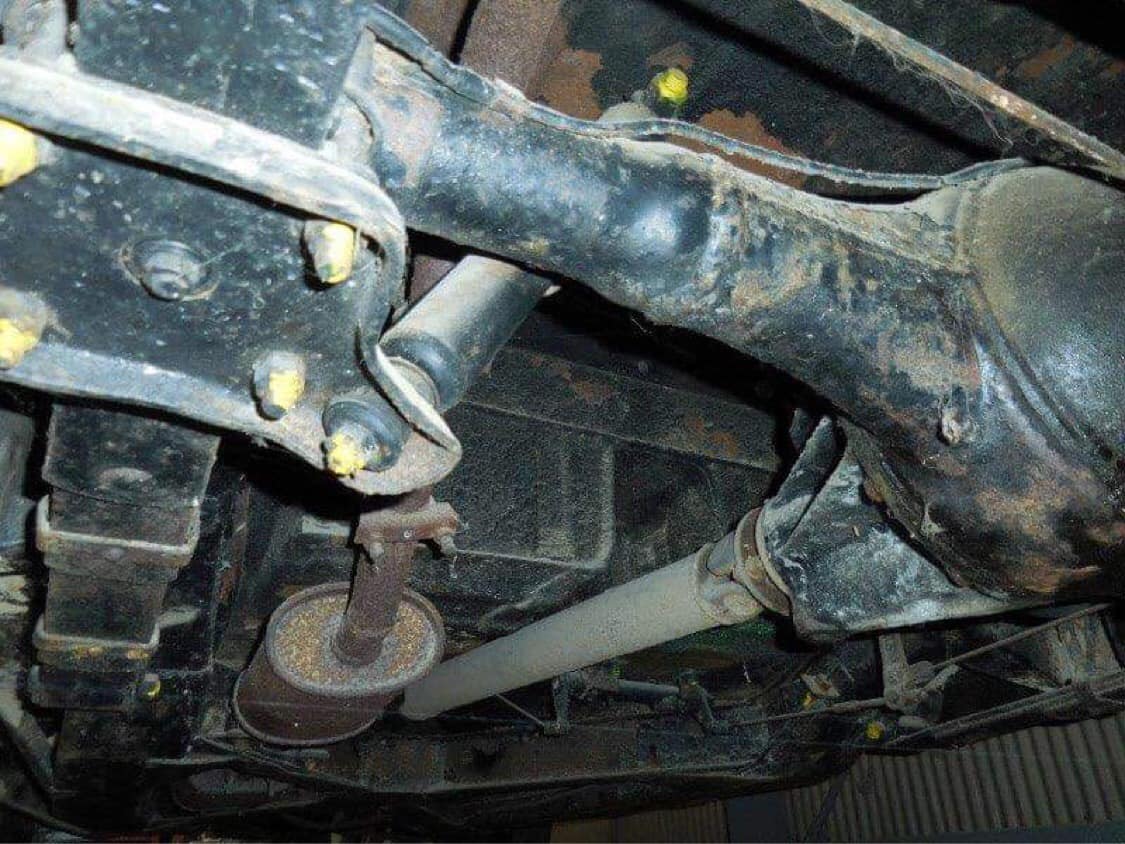
Below is a picture of the underside of a CSP311. You can see yellow marks over some suspension bolts/nuts. These are factory marks to show that these bolts/nuts had been torqued/tightened at the factory. It can also indicate if the mark is not aligned, the bolt/nut has loosened. It is interesting to see these still exist after all these years.
以下は、CSP311 の下側の写真です。 サスペンションボルト/ナットの一部に黄色いマークが見られます。 これらは、これらのボルト/ナットが工場でトルク/締め付けられたことを示す工場マークです。 また、マークが合っていない場合は、ボルト/ナットが緩んでいることを示すこともできます。 これらが何年も経った後もまだ存在しているのを見るのは興味深いことです。
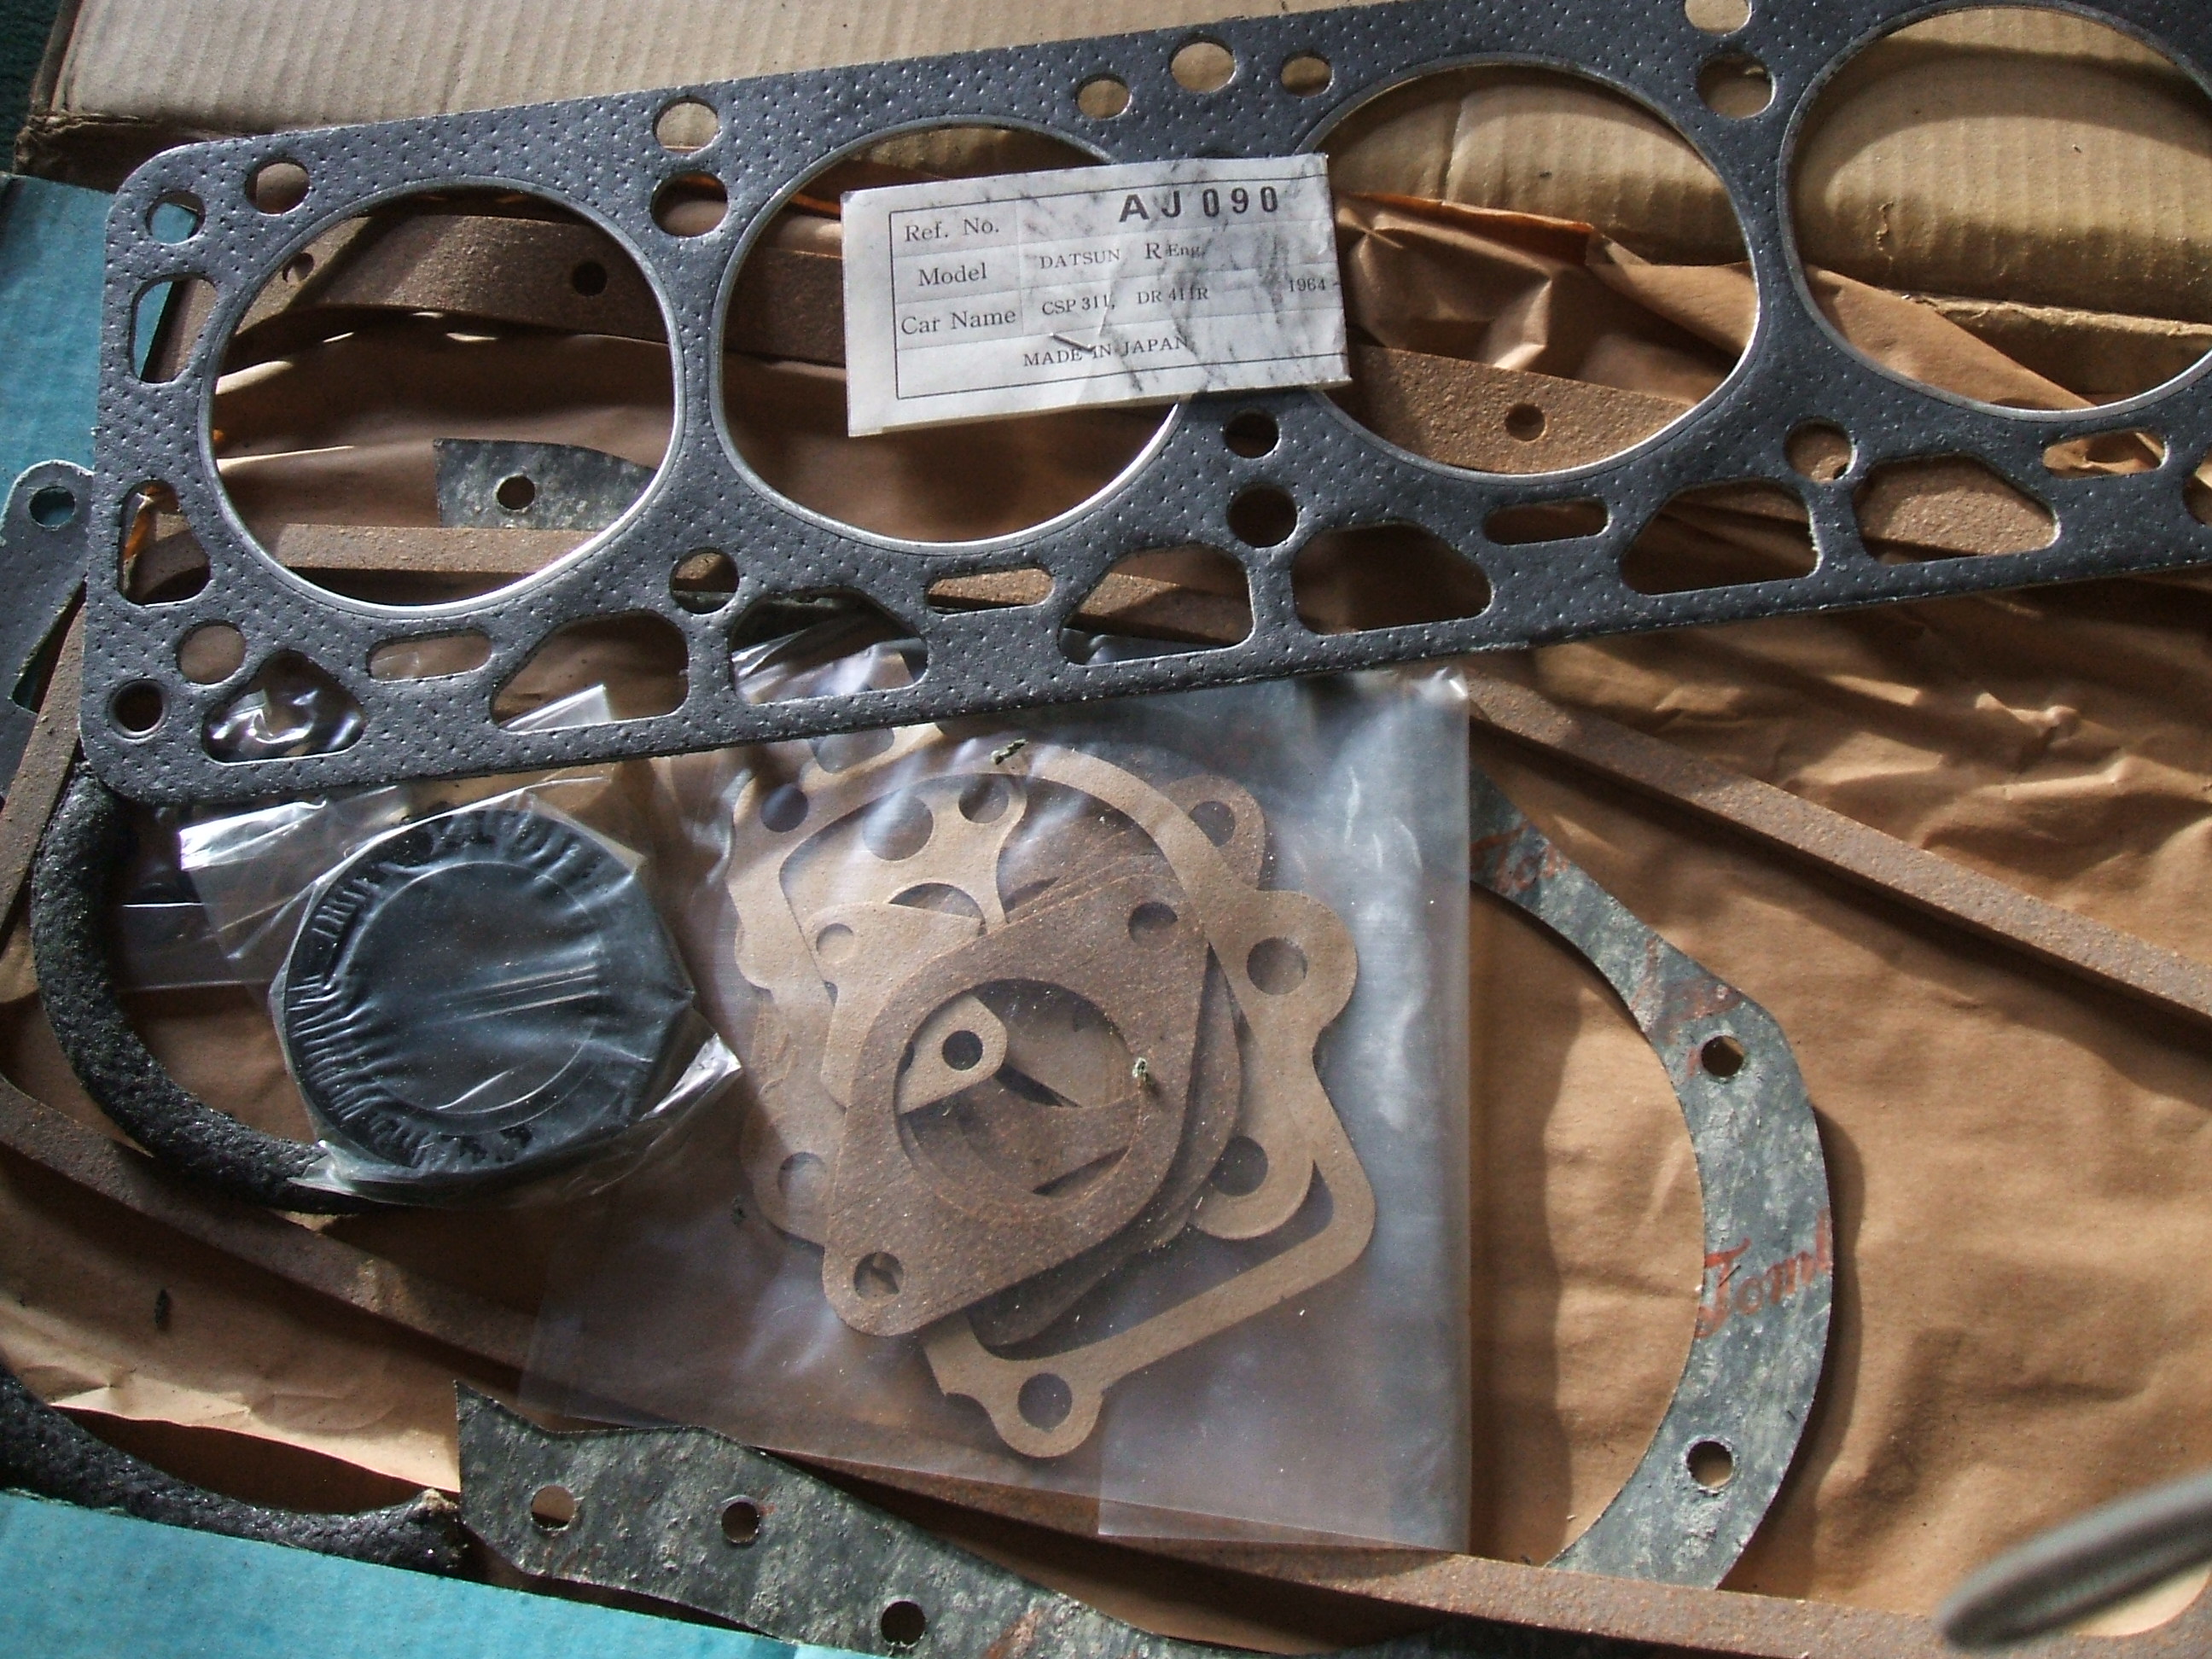
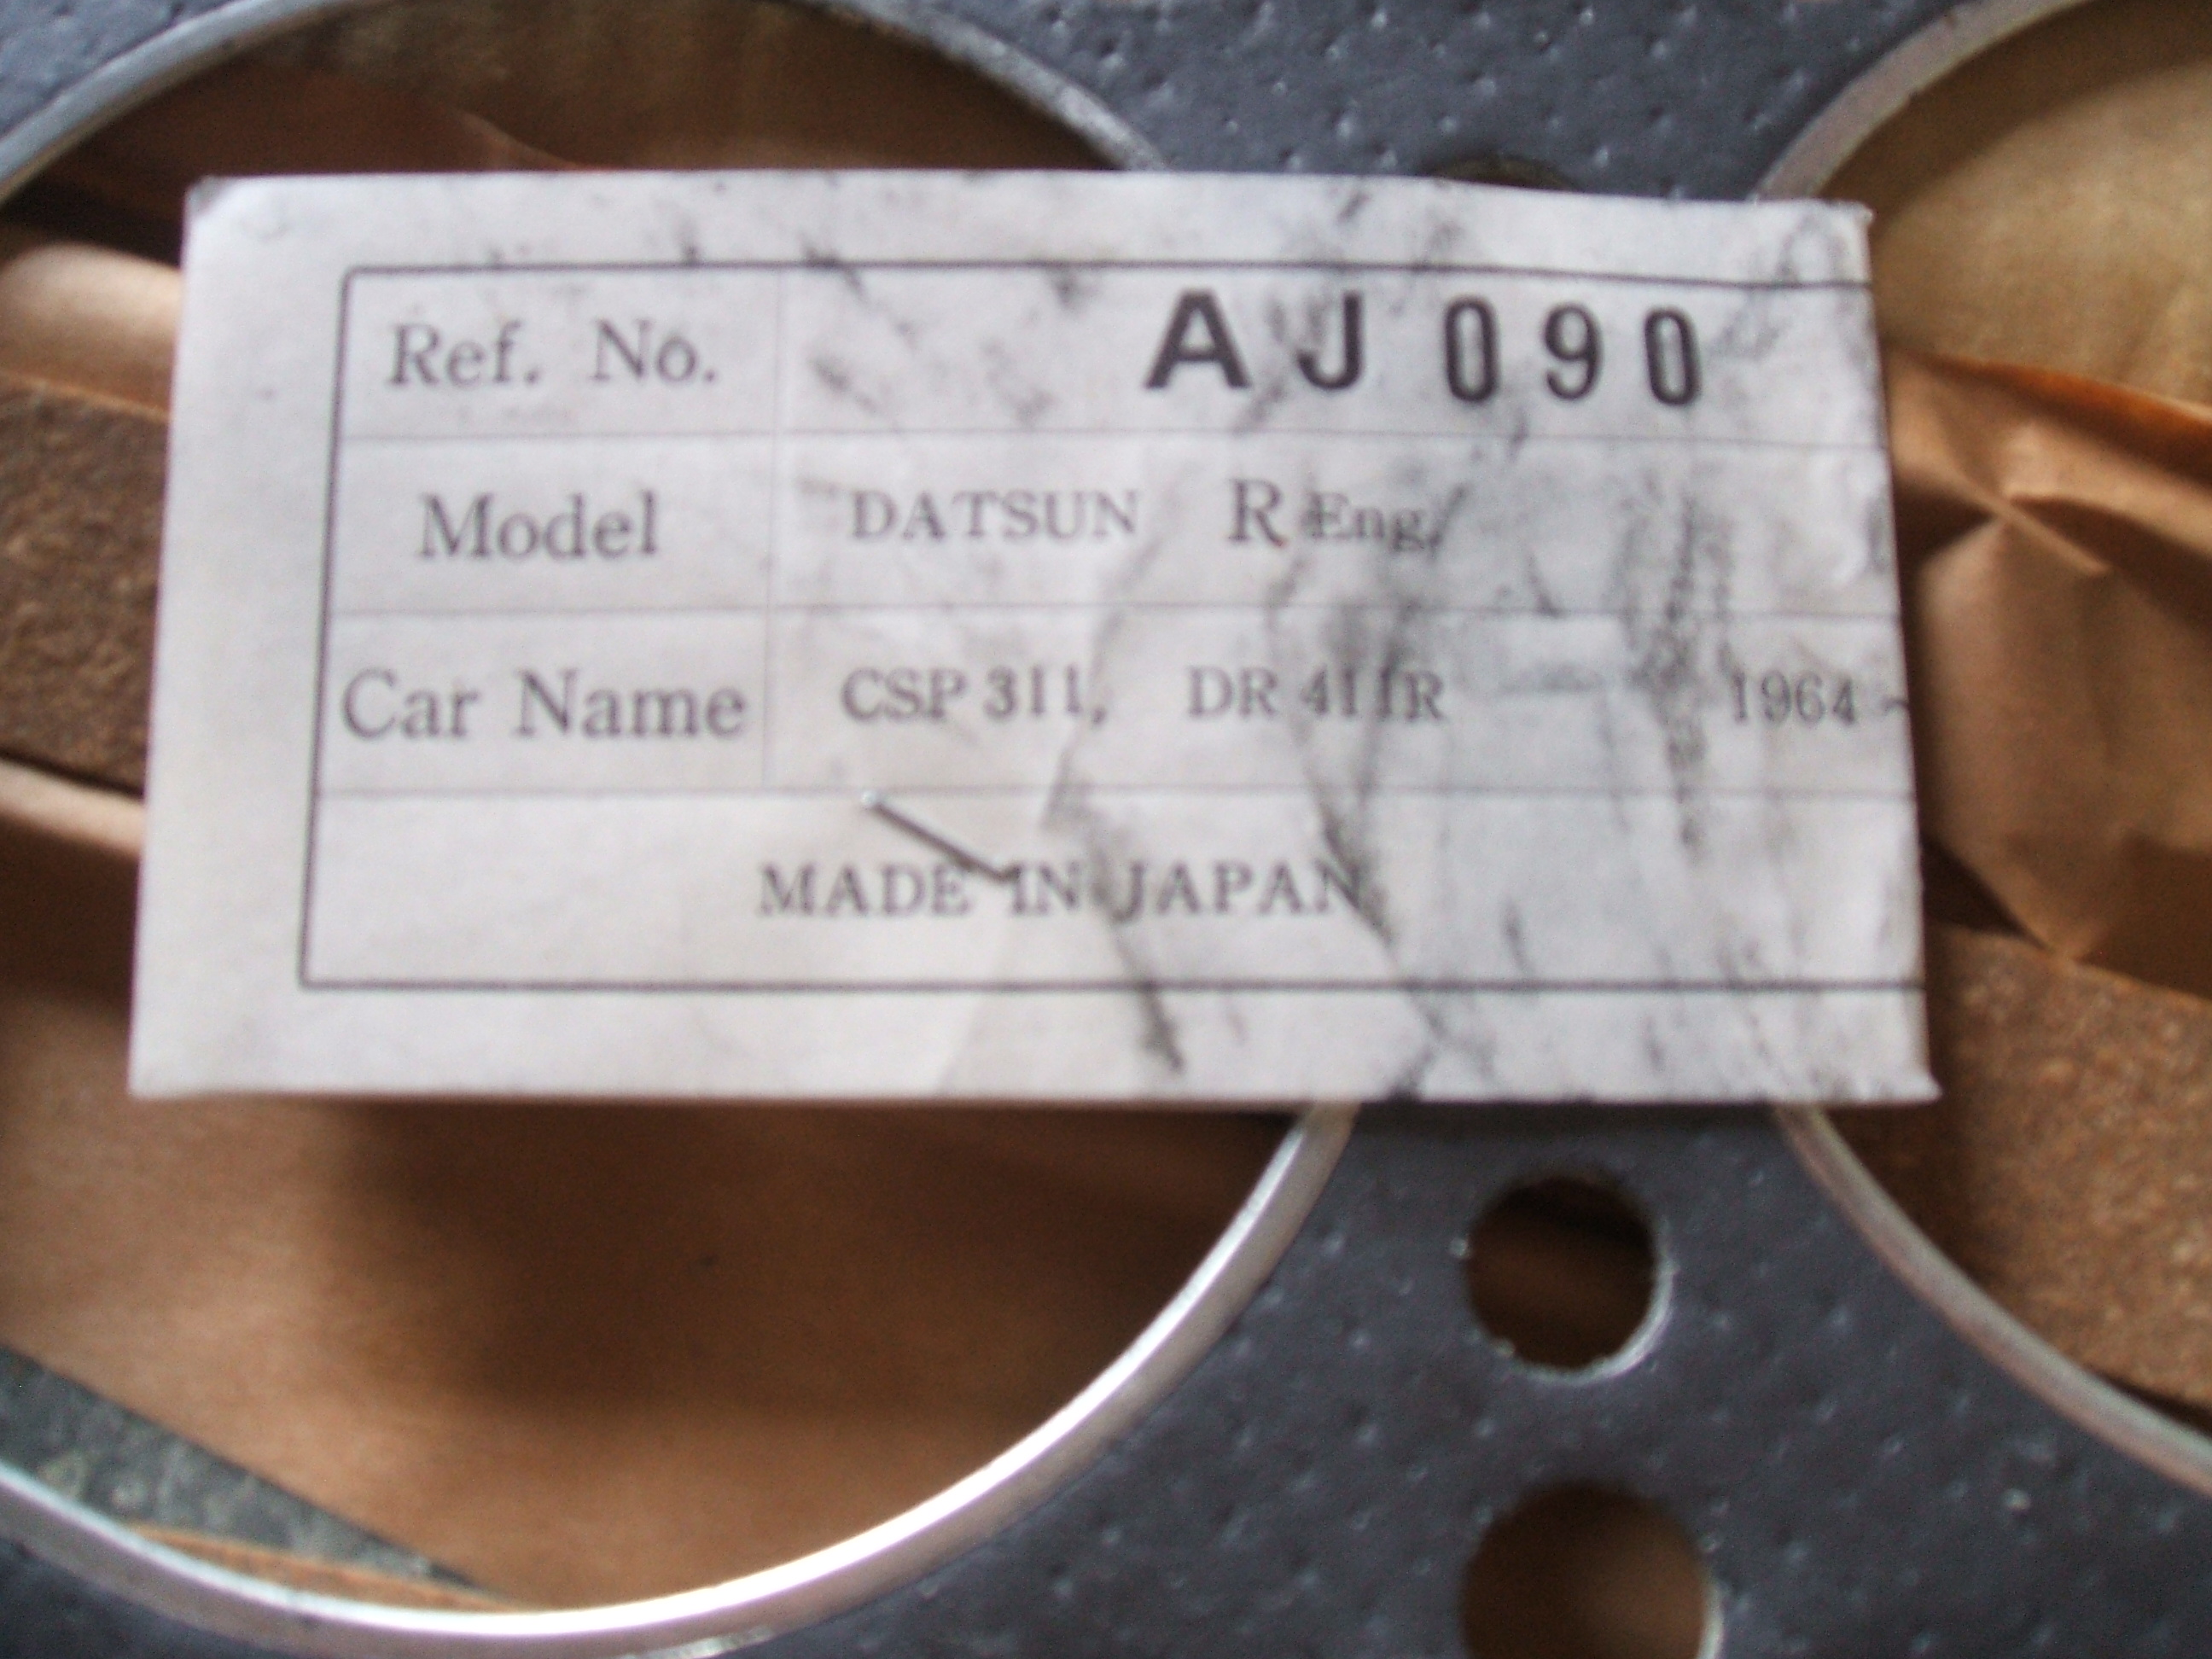
I was surprised to find on Ebay an engine gasket set for the R series engine. I did not think the UK got a model with that engine imported. Anyway, the gasket set is now mine. No manufacturer on the box. But I think it is Payen.
Ebay で R シリーズ エンジン用のエンジン ガスケット セットを見つけて驚きました。 英国がそのエンジンを輸入したモデルを入手したとは思いませんでした。 とにかく、ガスケットセットは今私のものです。 箱にメーカーはありません。 でもペイエンだと思います。